
This is the SimpleOSD Ultralight Edition from Flytron.com. It weighs about 3 grams and is roughly the same size as an SD memory card.

The OSD came nicely packaged in an anti-ESD bag (a sign of a serious manufacturer). The total package size was tiny, which makes the shipping cheap. The OSD does not come with any physical manual, but you are directed to an online manual. The manual is very clear and full of pictures and diagrams, which explains everything in detail.
The PCB is made from a thin glass fiber lamination making this OSD super light weight. I work in the electronics manufacturing business so I couldn’t help admiring the layout design of the tiny PCB. This designer knows his stuff.
Features:
Size: 27x35mm
Weight: 3.11 grams
Inputs: Video TX & Camera connector | Main battery connector | Secondary battery connector | RSSI input | Analog sensor input | GPS/Firmware input
Operating voltage: 2-4 cells LiPo
Current consumption: <100mA
Supported video formats: PAL/NTSC
Upgradeable firmware: Yes, via included USB interface
The OSD superimposes the text onto the video feed in the top left corner. The text is left margin aligned, which means that if you want to display more text it will build on from the left corner. The text is displayed in a pretty small font, but it’s really clear and easy to read, without taking up too much space or cluttering up the picture.
![]()
The SimpleOSD is able to monitor two voltages simultaneously and if you use the optional current sensor, you can also monitor current and capacity (mAh) used. It also has an RSSI input for measuring the signal strength from the receiver, and an analog input for different custom sensors. You can also connect a GPS for displaying parameters like altitude, speed, distance to home and home arrow. (Although Flytron recommends getting the SimpleOSD XL Edition if you want better GPS support, as the processor on the SimpleOSD Ultralight doesn’t have enough code space. If you want all the GPS parameters you will have to give the RSSI and current sensor 2 calibration up. You can calibrate the values with the non GPS firmware first and then upgrade to the GPS firmware, but I would recommend paying a little extra, and get the XL Edition, if you want the GPS data.)
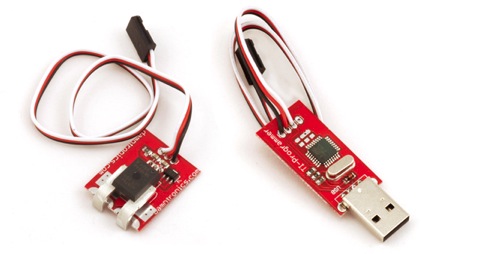
Optional current sensor and the included USB interface
Connecting:
This OSD is not what you call “plug and play”. You need to be able to solder to hook it up. Included in the package is some pin headers that you can use if you don’t want to solder wires directly to the PCB.
One thing that surprised me was that you hook up the OSD in parallel with the video feed. I haven’t seen this solution on a OSD before, (they usually hook up in series) but I can only find positive things about it. If the OSD were to fail, you still have a functioning video feed, just without the OSD information (unlike a OSD in series, where you get no video at all). It also simplifies the wiring in my opinion. Great idea!
Configuring:
Configuring the SimpleOSD is super easy. You simply press the little button on the top side of the PCB and the display toggles between a range of different preset display options. The first one displays only the main battery voltage. The second one displays the battery voltage + current and mAH used. The third adds RSSI information and so on. In all there are about 10 different combinations to choose from.

Calibrating the current sensors and RSSI is equally simple. You just hold the button during boot up and a menu will appear. You then press the button when the menu displays the parameter you wish to calibrate. It takes about 30 seconds to calibrate two current sensors and the RSSI input. Easy as pie.
Firmware update:
The SimpleOSD’s firmware is continually being improved by the manufacturer. To update the firmware you simply plug the included USB interface into the OSD and run the software that you download from the online manual homepage. It’s neither hard nor complicated. It only takes a few minutes, and the manual describes the whole process in perfect detail.
Inflight videos:
Conclusion:
This OSD is made to be simple. It doesn’t look like a F16 head up display, it hasn’t neither an artificial horizon nor a speaking voice telling you facts every 10 seconds. It’s made for those of you that just want the necessary info for flying and don’t want the whole screen full of text. For instance, all I want is battery voltage, mAH consumed and RSSI. That is all I need, really, and this OSD is perfect for that. Not only that, it’s also cheap, lightweight and easy to install.
Pros and Cons:
+ Cheap
+ Small
+ Lightweight
+ Easy to configure and use
+ No unnecessary, unwanted info on your screen
+ Can measure two battery voltages
+ RSSI input
+ Connects in parallel with the video feed
+ Includes USB interface for firmware updates
– You need to solder the connectors yourself
– Limited capacity (it is made to be simple…)
There is no doubt about it, this is an excellent product!

Leave a Reply
You must be logged in to post a comment.