
A while back I built this 70mm EDF SAAB JA37 Viggen for an episode of FliteTest. I finally go around to posting the complete build log here


A while back I built this 70mm EDF SAAB JA37 Viggen for an episode of FliteTest. I finally go around to posting the complete build log here
To anyone who can help,
I was inspired by David’s Tricopter builds, but finally decided to go with Jason Peterson’s http://www.instructables.com/id/Inexpensive-Wooden-Tri-copter/
My list of parts is exactly as his, i.e. RCTimer’s 2830/8 1300KV Outrunner Brushless Motors and
Hobbyking SS Series 18-20A ESCs, etc., except for the battery.
The ZIPPY Flightmax 3000mAh 3S1P 20C was not in stock, so I bought this one instead: Turnigy 3300mAh 3S 20C Lipo Pack.
I also went for the: Hobbyking X900 Tricopter Glass Fiber Multi-Rotor Frame, instead of his wooden frame.
As I am a newbie to all this I took things very slowly. I flashed the controller with the V1.6 firmware.
The receiver was already bound to the T9X. I chose the Helicopter 90 degree setting.
I checked that all the motors were rotating in the correct direction and the that the yaw mechanism was working via the T9X.
I then tried to get all the motors to start at the same time by trimming the controls on the T9X and managed to get them right but not always.
Finally I balanced the props and mounted them on the motors.
I tried to repeat the process by just giving the T9X just enough throttle to start the motors,
so I was not revving them enough to lift the tricopter, when I noticed the left front prop alternatively turning in both directions then the motor started to smoke!
I switched off and disconnected the battery immediately.
I let the motor and ESC cool down and tried to power up again, but instead of the usual chirping and silence, I got several chirpings from the ESCs.
When I disconnect the motor and powered up again I got the normal chirping from the ESCs, so I guess the motor is fried, the windings do look a bit darker in parts.
What do you think? Was I just unlucky with a duff motor, or did I do something wrong?
Perhaps the LIPO is too powerful for this configuration? (It is only a 3300 20C as opposed to Jason’s 3000 20C)
Perhaps the frame is too heavy although I did not try to get it off the ground.
Or can you think of something else?
I have ordered a new motor from RCTimer and a new ESC from HobbyKing, but I will wait to hear from this site before trying to connect it all up again,
in-case you have some good advice?
Regards,
Chris.
David,
My wonderful wife purchased a Storm Drone 6, from Helipal.com, for my birthday this summer. I have been flying it a lot and have even started my own YouTube channel. My only issue with it is that is has such limited flight time. About 5 min without camera payload. Is there some way that I can extend my flight times? I’ve put two batteries in parallel and try to keep my throttle input smooth and steady but I’m not sure what else I can do. Should I start to look at swapping out the stock escs and motors? Any input you have would be great. I have been following you and the rest of the flite test crew for a few weeks now and have watched almost all of your videos. Keep up the good work!
Thanks!
Tim
2 years worth of crashing in 1 video = fun!
🙂

The J37 Viggen is my absolute favorite airplane of all time. I’ve been thinking of building one for a long time, but I didn’t just want to build a flat foamy. I wanted to do it’s awesome curves meaty fuselage justice. So I decided to cut one out of 4 inch thick Bluecor using a hotwire.
Here is the plans to the formers used in this build: EDF Viggen Plans

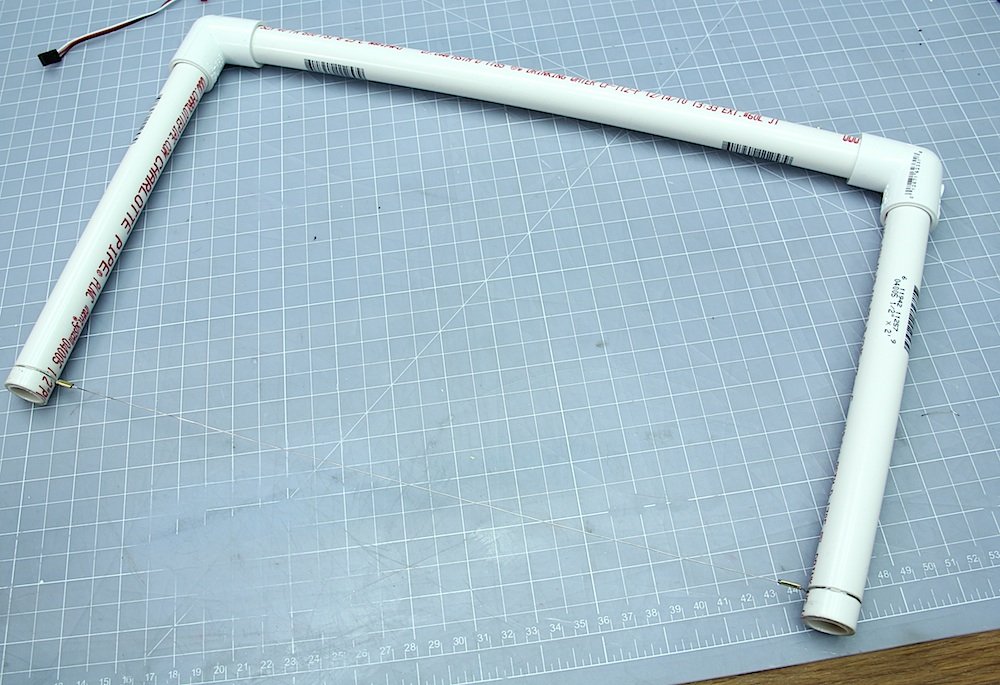
Since Chad didn’t have a hotwire in the basement, I had to build one from scratch. (How can people live without one?)

To do this build I didn’t really need a big hotwire bow. I rather have a small, light one that gives me great control over the fine movements and doesn’t make my arms tired.

Very basic shape. I didn’t feel the need to glue 1/2″ PVC pipe pieces together. The friction seems plenty strong.

The wire I use is 0.4mm thick Nikrothal 80. A nice thickness for this kind of work. It also doesn’t expand as much as other hotwires when it heats up which is nice. Regardless of what wire you get you will most probably not going to be able to solder it. To get around this problem I cut a small piece of brass tubing.

I then slip the tube over the wire and clamp it down hard using a pair of pliers.

The brass is soft and makes a great electrical bond to the wire and it’s super easy to solder to.
One thing you don’t want on your hotwire bow is a slack wire. To achieve this I simply pushed the two arms inwards when I attached the wire. This creates an outward tension in the bow that keeps the wire taught even when it get’s hot.

I wanted both wires to come out the same end so they don’t end up in the way when I’m working. I simply fed a piece of wire through the inside of the bow.

Soldered toghether. Nice and clean.

Close up of the solder joint.

To control the temperature of the wire I used a BRUSHED spedcontroller and a servo tester. That way I can easily control the voltage aplied to the wire and thus control the current flow, which is what is turned into heat. I^2 * R = Heat dissapated in the wire

I started out by cutting two blocks of 4″ foam
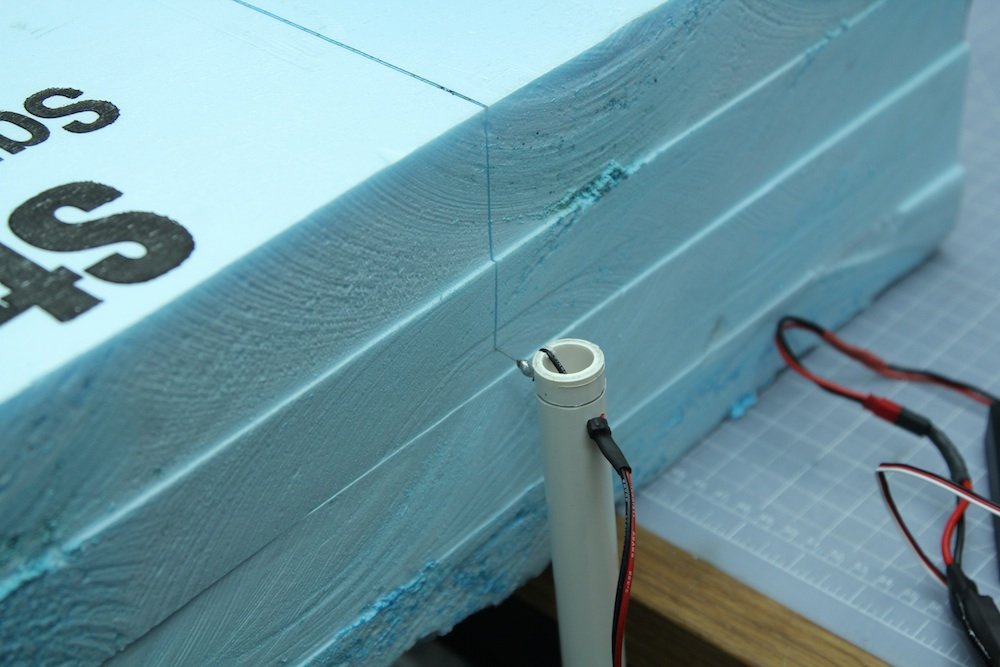
A tip is that the hotwire bow cuts perfectly straight down with the help of gravity if no external force is acting upon it. Just let it hang and make sure the power wire doesn’t affect it.

Used building needles to pin the formers down.

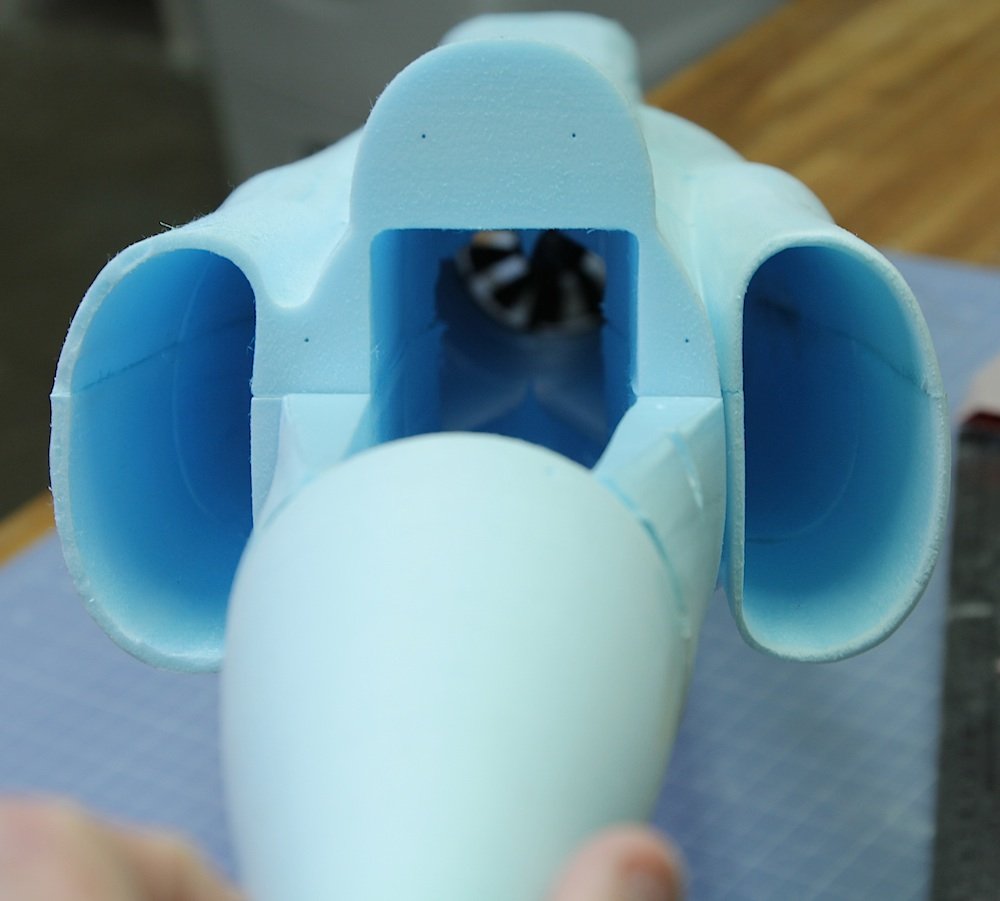
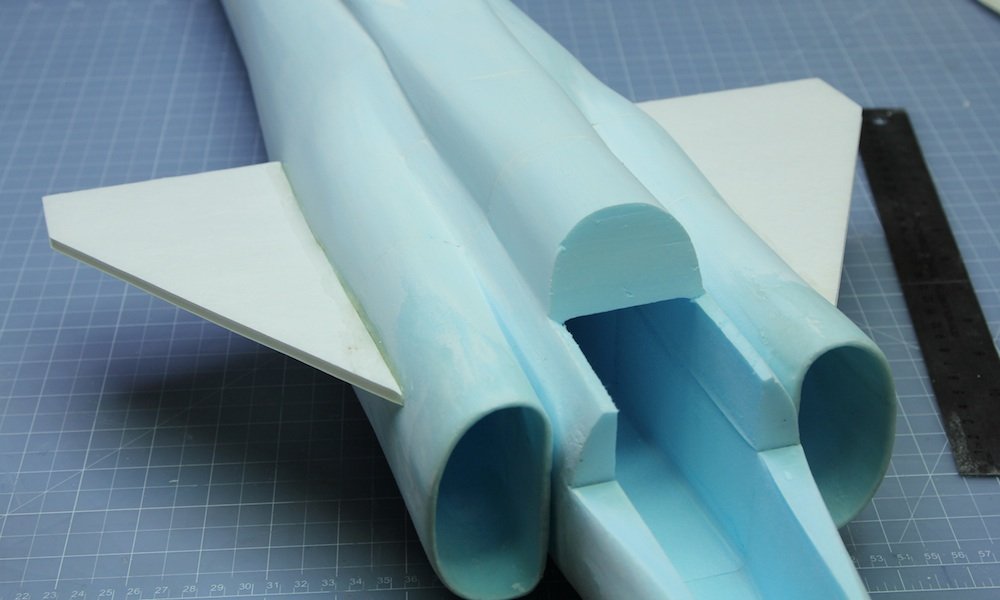
Started by cutting the air duct for the entire F-H and C-F first

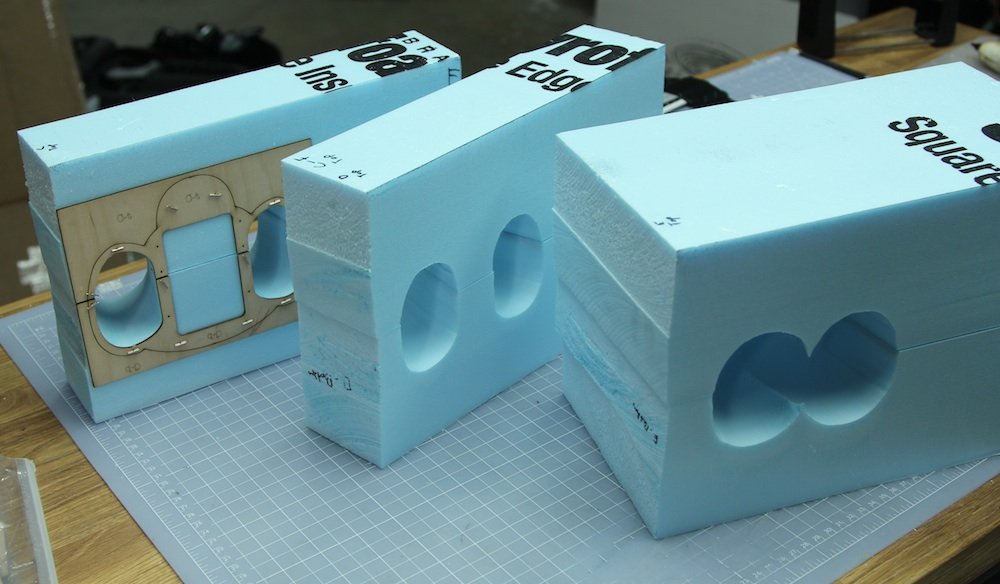
Then I cut the big pieces into the individual sections.

And cut the contours of each piece.

Video about the hot wire cutting process:


The F-H piece was a bit short so I had to add a piece of foam to the end.

Nose cone before shaping.

I used a power drill and some sand paper to shape it into a cone shape.

Done.

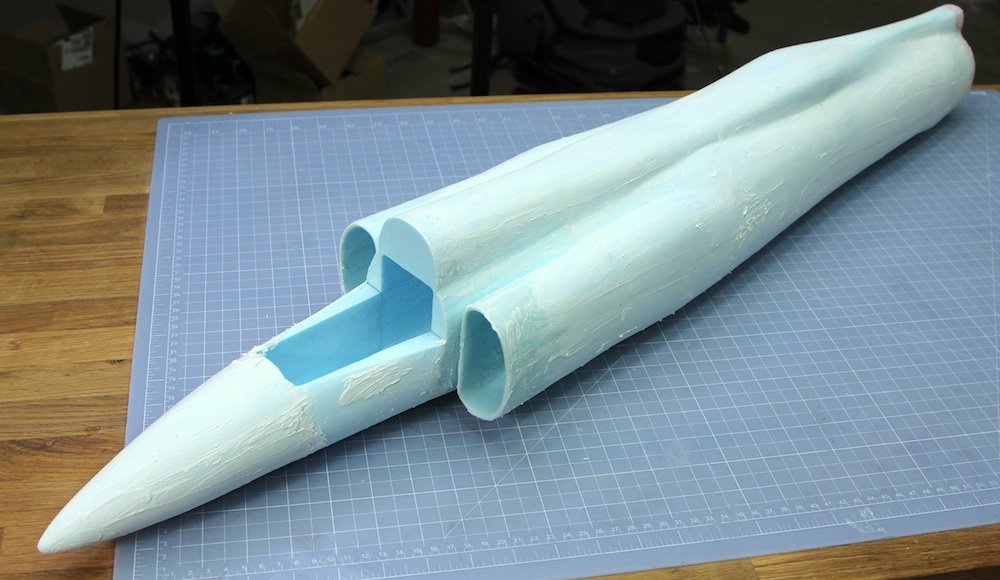
All pieces glued together.
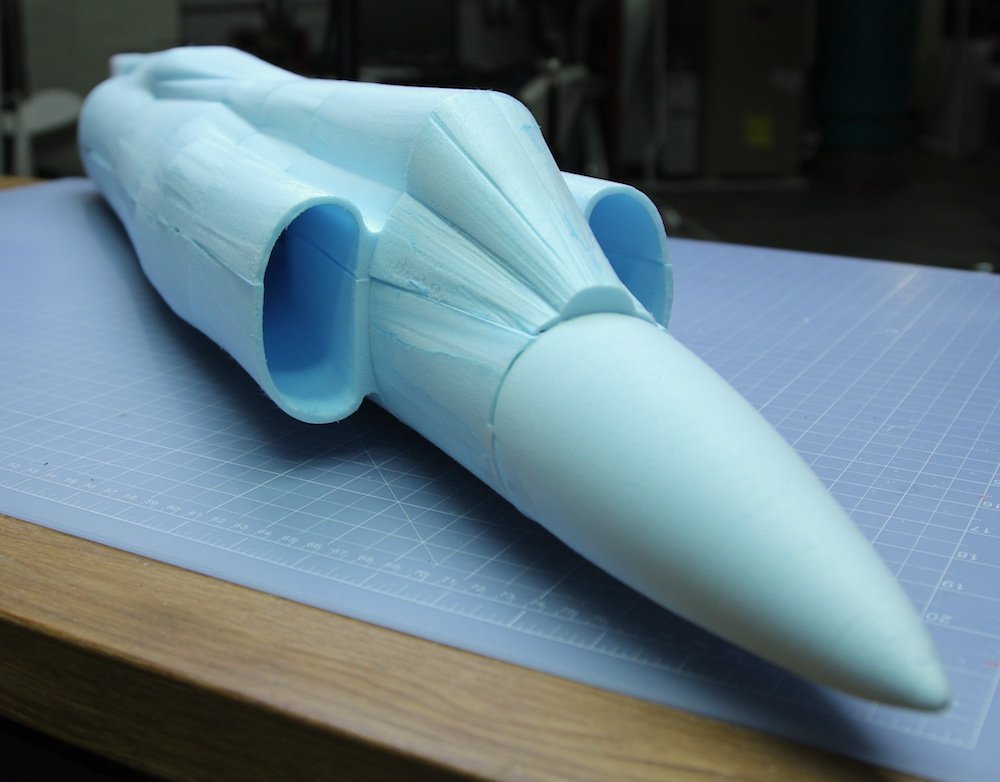
Nosecone fits pretty well

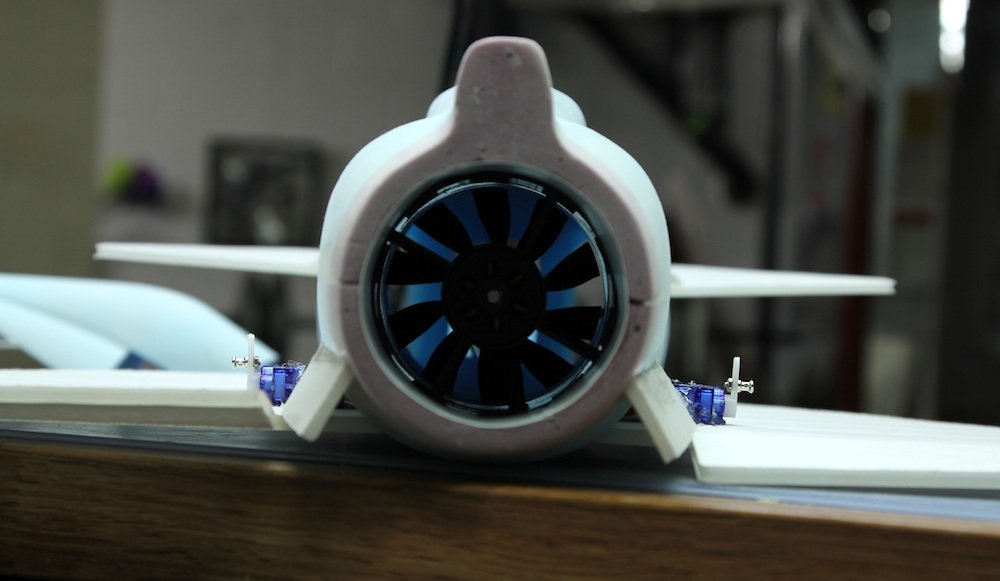
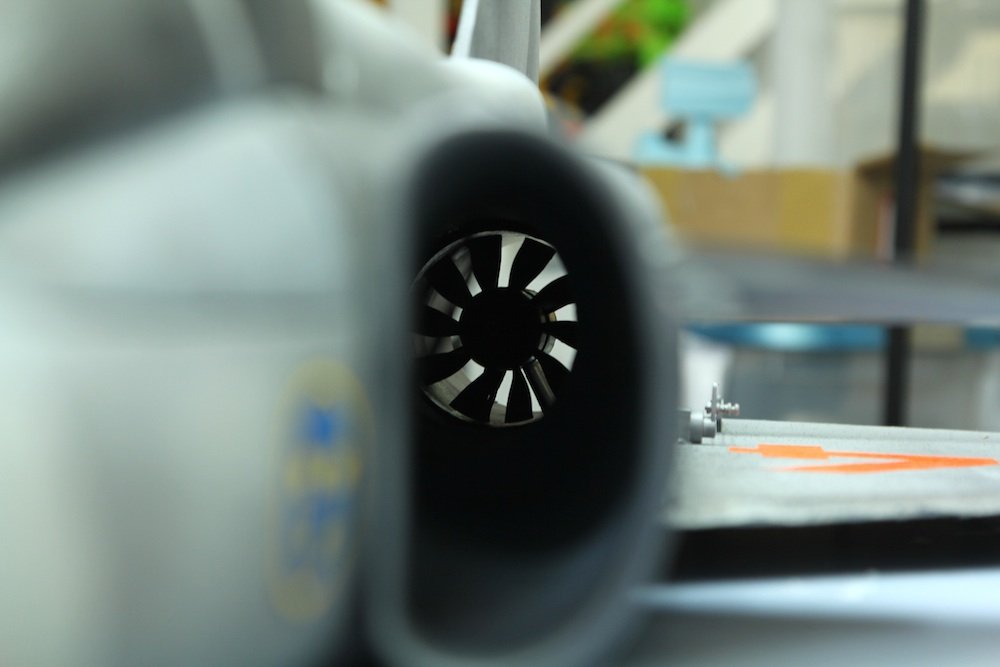
ChangeSun 10 Blade 70mm EDF unit
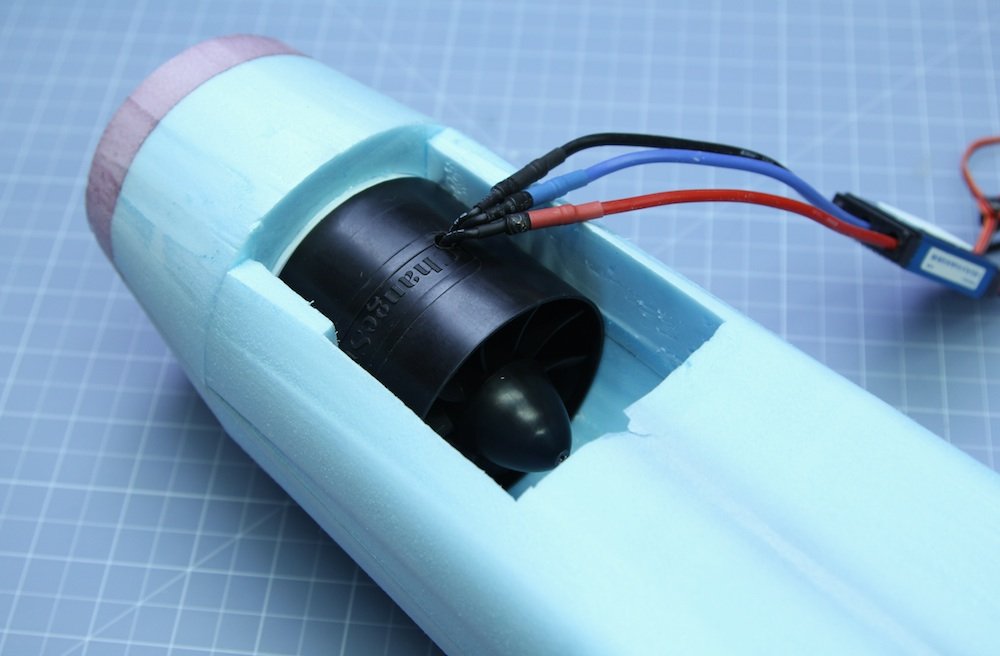
To get the CG correct I mounted the fan as far back as possible.
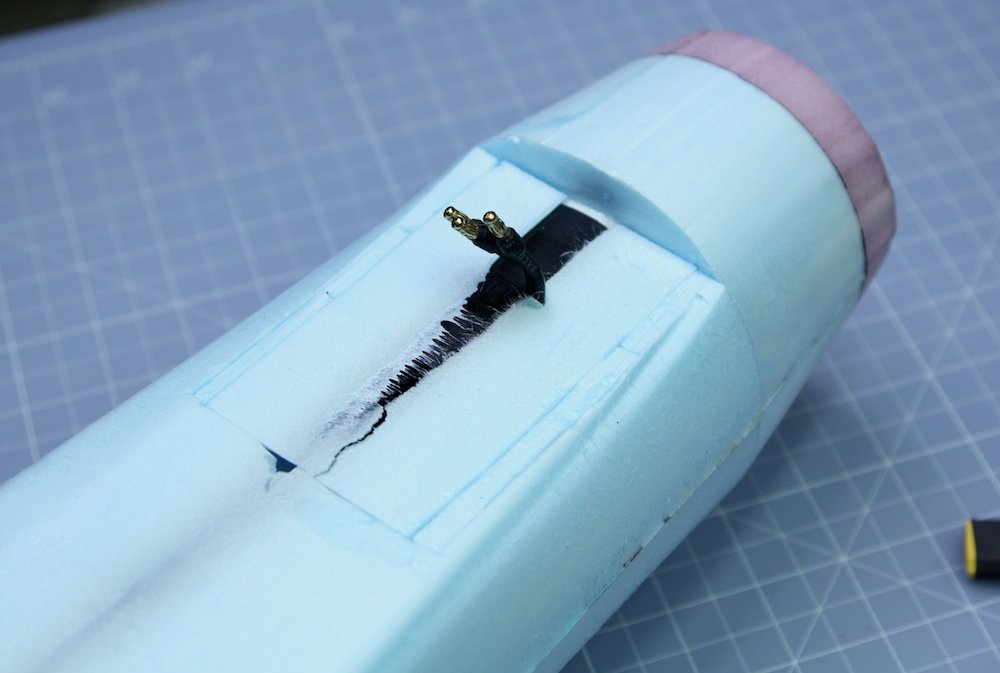


Time to fix the intakes.

Removed around 5mm.

Sanded away the material between the air intake and the fuselage as well as smoothed the intake edges.
Before and after.

The intake was way to fragile being that thin so I glassed the edges.

Now there nice and strong.

Sanded the whole fuselage.
Added a layer of light spackle.

Sanded it again.

Nice and smooth.

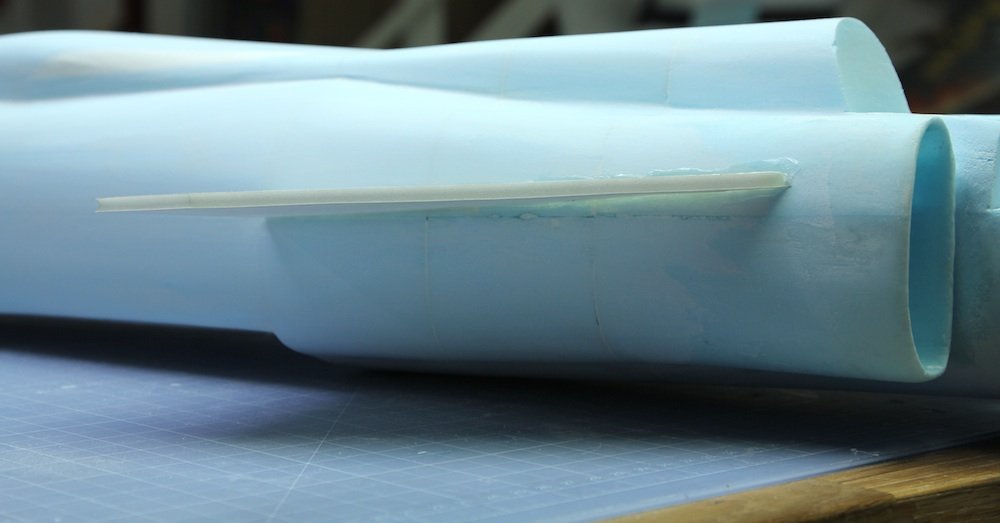
Cut the wing.

I strengthened the radar detectors on the wings with a 2mm carbon rod.
Installed the canards.
Notice the positive angle of attack.

Installed the wing.

Time for the servos. Glued using hotglue to the wing.

A detail that really transforms the plane is the wing fillers. Looks great and hides the servo wires.

Servo wires going into the fuselage.

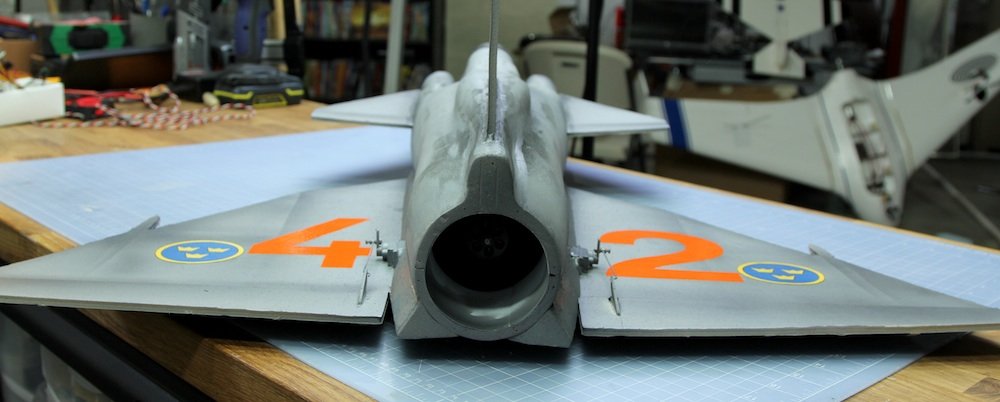
Added the bottom details to the exhaust.

I added a plastic tube on the inside of the exhaust to minimize the drag an add strength.
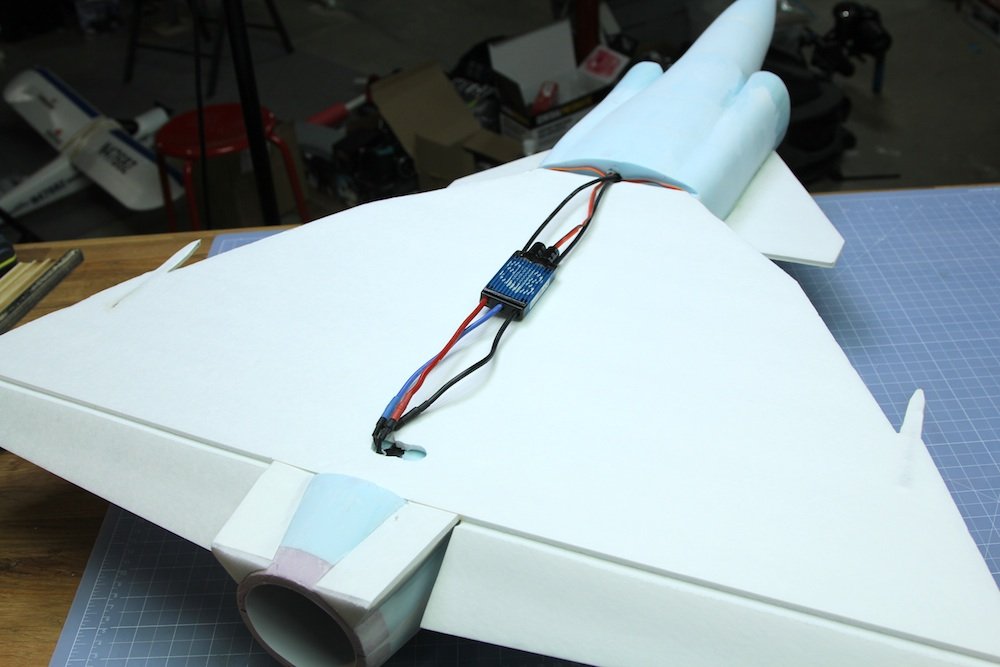
Speed controller installed.

The bottom plate covers the wires nicely.

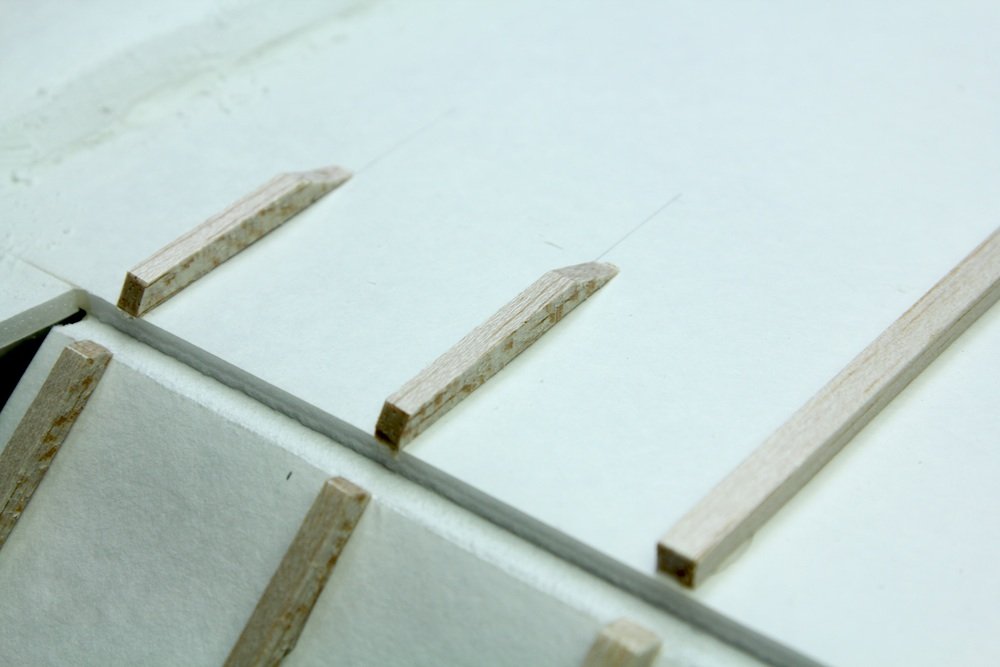
To add some scale detail I added weapon hard-points made out of balsa spars.

Installed the rudder

Control linkages in place and ready for the first flight.


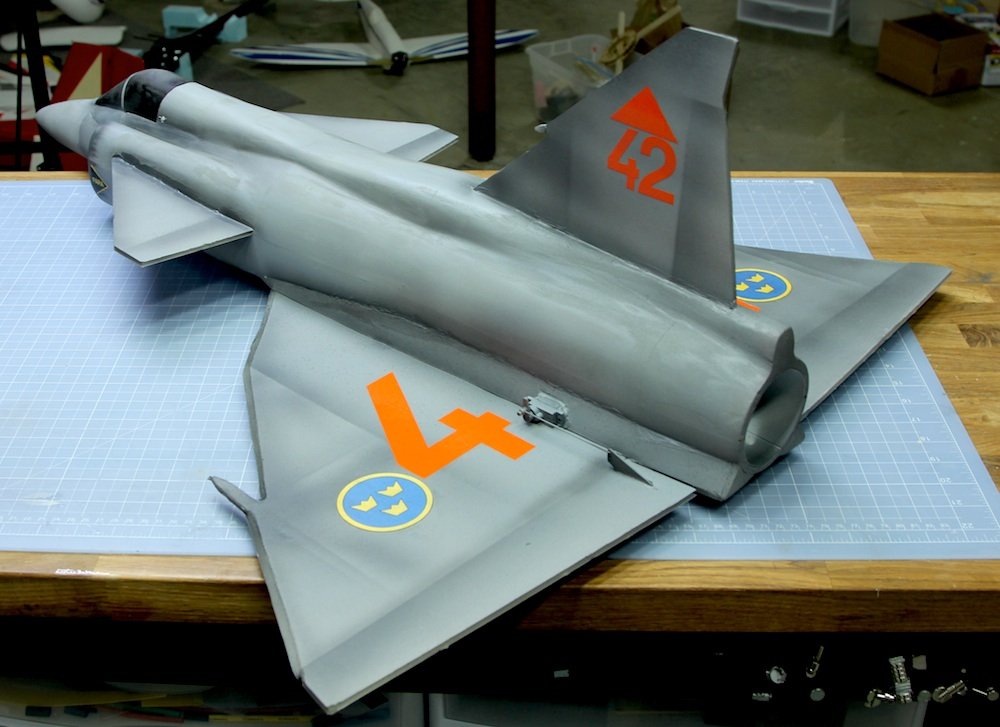
It flew awesome! Time to hand it over to Chad and have it painted.


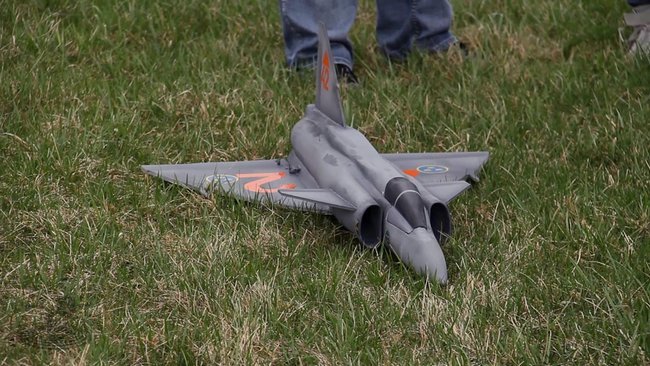
Just need some decals!
The numbers are cut from orange vinyl. All other decals were printed on normal sticky back paper used for shipping labels on a laser printer and then spray painted with a layer of clear coat.


Canopy held down with magnets.
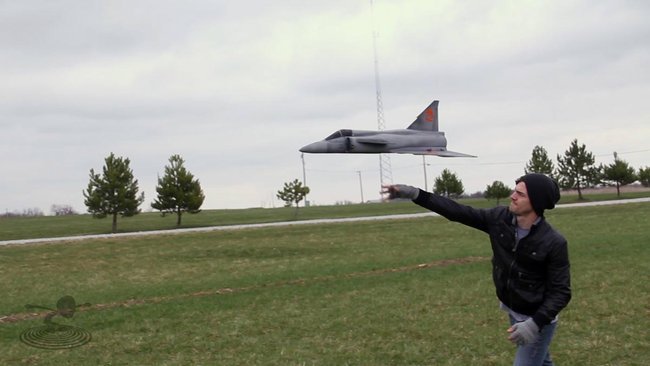
Up, up and away


Video: