
Specifications:
Resolution: Up to 640*480
Codecs: MPEG-4 SP, H.263
Formats: MP4, 3GP, 3G2
Frame rate: Up to 30 FPS
Operating voltage: 5V
Weight: 98 grams
Compatible card formats:
SD, SDHC, miniSD, miniSDHC, microSD, microSDHC
RS-MMC (Dual Voltage)
MMCplus, MMCmobile
Memory Stick, Memory Stick PRO, Memory Stick Duo, Memory Stick PRO Duo

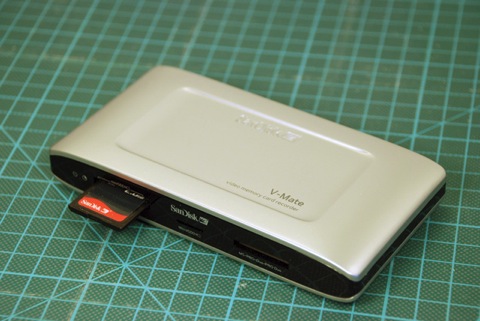
First impressions:
It is small and lightweight. It can use an impressive variety of memory cards. The design is quite nice.
Hooking up and starting:
Here is a picture of the connectors on the back:

Connectors (from left to right):
Power input
3.5 mm ouput for Composite Video, audio left & right
3.5 mm input for Composite Video, audio left & right
USB mini B
IR (infrared) emitter
It was pretty straight forward hooking the V-Mate to my FPV setup, it’s hard to get it wrong. Since it is operated at 5 volts rather than 12 volts like my other FPV equipment I had to add a voltage regulator to be able to run it of the same 3S LiPo.
The V-Mate takes about 20-30 seconds to boot up and once it’s done the first thing it wants you to do is set the time. This you have to do every single time you turn the V-Mate on! This is because it has no built in battery to keep track of the time and it’s made to have power all the time. Once you have done that you can start using it. If it is the very first time you boot it up, you have to go into the “Settings” menu and set the “Recording format” to “TV and PC” to get the best quality. Now you have to navigate to “Record now” to be able to start recording.
Now comes the worst thing about the V-Mate; When you record in the best quality the screen becomes totally black and only displays a red “REC” in the top left corner! If you record in a lower quality you get a tiny window of what you are recording.
Update:
From the Sandisk website:
“During recording in 640×480 resolution, there will be no recording screen bar visible. With V-Mate version 20-90-3112WW, the video being recorded will be displayed full screen. The blue LED next to the card slot will be blinking to indicate that the recording is ongoing. You can find the 20-90 number on the rubber label on bottom side of your VMate. V-Mate versions 20-90-03081WW and 20-90-03112WW will show a black screen with “REC” displayed in the top left corner to indicate the V-Mate is recording.”
So if you get a new V-Mate you will be able to watch the video while it’s recording!
This means that you have to have a dual output receiver and
1 Plug in your display to the V-Mate
2 Wait for it to boot up
3 Set the time
4 Navigate to the “Record now” menu
5 Start the recording
6 Unplug your display/glasses from the V-Mate
7 Plug it on the other output of the receiver
before you can fly.
I made a video switch so that I don’t have unplug any connectors but I would have liked to have a second display hooked up to the V-Mate so that my friends could have something to watch, besides a black screen that says “REC”.
Update: In the latest firmware you can now press the REC button twice after boot up and the V-Mate will start record! Good job Sandisk!
Recording quality:
The V-Mate records in 640*480 at 25FPS with a variable bit-rate in the best quality setting (PAL). The average bit-rate for a recorded file is usually between 3100-4700 kbps.
Here is the specs of a file recorded with the V-Mate:
Resolution: 640*480
Length: 8:46
Size: 218,6Mb
Average bit-rate: 3490 kbps
The recording quality of the V-Mate is not great, the quality is enough for youtube but not much more.
Here is a video made with the V-Mate
Conclusion:
The Sandisk V-Mate leaves a lot to wish for. A few wishes would have been;
– Being able to watch the video feed while recording – Now possible on the newer V-Mates!
– Better video quality
– 12 V operating voltage
– Being able to record directly after boot up with just a push of a button – Now fixed by Sandisk!
Previously I gave this recorder a 2 star rating, but now that it’s possible to record without having to watch the screen it jumps up to a 3 star rating!

Leave a Reply
You must be logged in to post a comment.