I rely like Eagletree’s stuff!
You can change almost everything to whatever you want.
This is extremely appealing to me as I can chose what I want to display and where.
Since I don’t have the GPS expender yet I chose to display the mAh used in the top left corner, the battery voltage in the top right corner and underneath that the amp draw.
I found that this layout worked out best for me.
I don’t like to have anything in the bottom of the screen since that is the part of the screen that is most interesting.
You’ll have to see for your self in the next video.
Pushed the range a bit to about 3km without a problem with either the RC or video connection.
I also tried aiming the RC TX away from the airplane to see how wide the beam with was, and it was surprisingly wide
It was verry cold after 15 minutes in the wind at -9°C, as you can se on the landing
Now its time to start the build of my new FPV Easystar!
I started out with some 2mm carbon rod to stiffen up the elevator
Nice and flat after sanding som exess of
I also added a 6*1mm carbon strip to stiffen the rest of the tail (I dont like flex )
Some 10*0,5mm carbon strips in the wings
It adds a lot of strenght to the wing
I also added a washer thats 18mm across and has a 8,5mm hole so ensure that the carbon rod that goes in to the wing doesn’t ware on the epp hole and make the connection sloppy.
Melting away some epp with my soldering iron (I use a diffrent tip for this)
6mm carbon rod glued in
I use a layer of heat shrink on the motor so that I don’t have to glue the motor itself to the EPP
Melted some extra room for the wiring to the ESC
Making myself a new rudder from the start
Made frome lightwheight plywood
Monocoated it with dayglow orange
Du-bro hinges are so sweet
Since the range of my video TX is much further than my RC link I thought that I would increase the range a bit.
To do this I will replace the stock 3dBi Omni antenna with a 9dBi Patch anenna.
I decided to change the SMA connector to a U.FL to eliminate the losses that comes with having long wires and multiple chain connectors.
Re-assembling the patch.
The patch in place and hooked up.
I’ve used this LiPo in this transmitter for over a year and it has worked flawlessly.
I use a diode in series with the battery to lover the volts by 0.9V.
I made a step-up converter to be able to get rid of the 3s500mAh battery I used before, and since I fly on a 3sA123 I need to step-up the voltage to 12V to power the video setup.
Sorry for the messy layout but I didn’t feel like making a new board after adding the necessary filtering.
I had to sacrifice looks for performance when I mounted the FASST antennas.
One of the two gyros that is going to help me get a nice smooth flight in a little more wind
The other gyro hasn’t arrived yet, but it’s going to be mounted at a 45° angel to get best performance for the rudder.
Heat shrink on the servos to not have to glue directly on the servos.
Just before the gluing of the fuse.
Glued.
Tail glued.
Push rods mounted.
Servos in place.
6*4 Prop mounted
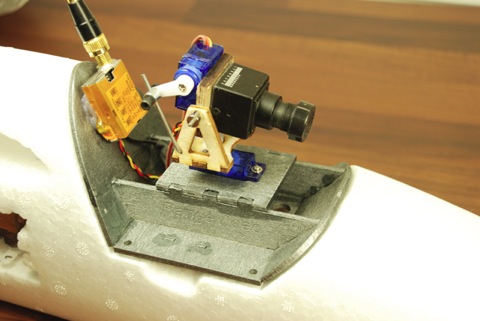
EZ-Pod before.
After.
Painted silver (Looks a lot better IRL)
Added magnets for security.
3sA123
All Up Weight (AUW). This is with the FPV setup.
A successful maiden!
Pushed the range a bit to about 3km without a problem with either the RC or video connection.
I also tried aiming the RC TX away from the airplane to see how wide the beam with was, and it was surprisingly wide
It was verry cold after 15 minutes in the wind at -9°C, as you can se on the landing
I maidened it without the FPV setup to trim it out and test the gyro. (It makes no sense in crashing the FPV setup when not flying FPV)
Everything went fine and it didn’t need a single klick of trim.
If flew awsome!
My hands could not take the cold for verry long so the first flight were about 4 minutes.