New video: F3K from a different perspective

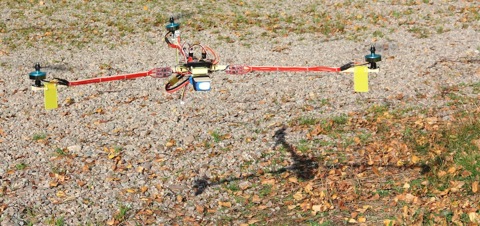
This video was filmed using only one GoPro, which was only held on the plane by double sided sticky tape.

The GoPro without the case weighs as much as 1/3rd of the plane itself.

The flight time with the GoPro mounted was roughly cut in half. It was quite a challenge to catch thermals with twice the drag.

The video was made from about 30 flights.

The second airplane was flown by my friend Kajakmannen. A big thanks for helping out!

Here is a link to my build log of the plane in the video

Receiver ready Tricopters for sale

I have a few ”receiver ready” V2.5 Tricopters I’m now offering up for sale.
Tricopter93

The Tricopters are built exactly like the V2.5 build guide.
All you need to do to make your first flight is to mount the landing gear using the included zip-ties, hook up your receiver, plug in your battery and check the stick direction. The Tricopter is already built, the gain is already set, the props are mounted and balanced, the gyro directions are already set up, the throttle range is calibrated, the ESCs are properly programmed and so on. I have test-flown them all and tuned them in accordingly.

The Tricopters also comes with two extra props (these have not been balanced, though) and one extra wooden arm for your first mishaps.

Things you need:
3s2200mAh Battery (Bigger battery is also ok)
4 channel (or more) receiver and transmitter

This is how you check if your transmitter sticks transmits the stick input in the correct direction:
– Turn on the transmitter and then the flight-controller
– Try arming the controller. (Move the throttle stick to the down-right corner) If the LED does not light up, reverse the rudder channel.
– Start the motors by raising the throttle (around 1/4 or so)
– Move the Pitch (Elevator) stick on the transmitter forward. The back motor should speed up. If it doesn’t, reverse the channel in your transmitter.
– Move the Roll (Aileron) stick to the right. The front left motor should speed up and the front right should slow down. If it doesn’t, reverse the channel in your transmitter.
-Done!

Do remember that these are KK-tricopters, no fancy auto-leveling and such, they don’t fly themselves. You have to learn how to do the flying.

So, would you want one of these limited numbers of Tricopters V2.5 built by RCExplorer? The price tag is 700 600 USD and payment will be via Paypal (or bank transfer for Swedish buyers), shipping included (as a registered package with the Swedish Postal Services). When your order has been confirmed, you will have 7 days to complete the payment, so make sure that you can fulfill this requirement before you order, please. First come, first serve. Use the contact form and please write ”TRICOPTERORDER!” in the subject line to make sure that it isn’t lost in my messy inbox.

Update:

monopoly copy

700 dollars did sound a little high, so I went back and recalculated all the expenses I had when building the Tricopters. I soon found my error, I had mixed up the currencies of one post. 100 SEK and 100 USD is big difference. The correct price for the tricopters should be 600 USD. I will refund a 100 USD to the people that have already ordered and payed. Sorry for the mixup guys.

post

Changing the firmware on a HobbyKing KK board

This guide is made for the Hobbyking KK board V1 but will work just the same for the Hobbyking KK board V2, the only difference is that you have to select the correct board in the flash tool (The V2 uses a different processor). The V2 board is capable of running more advanced firmwares like the XX, where as the V1 is limited to the ”standard” firmwares.

The HK KK boards comes pre-flashed with the ”+” Quad KK firmware. In this guide we will change it to the Tricopter V1.6 firmware.

You need two things to change the firmware of the HK KK board:

First thing is an AVR programmer. I use this AVR programmer from Flytron. But you can get one really cheap from Hobbyking or ebay. Search for ”usbasp” or ”AVR Programmer” and you’ll find loads.

Second thing you need is an adaptor. Normally the AVR programmers comes with the standard 10 pin output, but the HK KK is 6 pins. Luckily the adapter is so easy to make that anyone can do it.

6106728233_aa7d12c230_b
(Picture by arch001)

On the left you see the output from the 10 pin AVR programmer and on the left the 6 pin port of the HK KK board. All you need to do is connect the correct pins to each other. 1 to 9, 2 to 2, 3 to 7, 4 to 1, 5 to 5 and 6 to 10.

6106759561_795bfc1a8a_b
(Picture by arch001)

HKKK2
I soldered my own adapter but there is a simpler way that doesn’t require any soldering

HKKK3
That way is to use two servo extensions. Simply remove the protective plastic and pull the pins out.

HKKK4
Plug the pins into the connector in the right order and you’re done. Just make sure that the pins doesn’t touch each other. If you like to make the adapter reusable you can add some hotglue on the pins so that you don’t have to plug each pin in separately next time.
(Pin position in the picture is only for illustrative purposes)

Now that you have you’re KK board hooked up to the AVR programmer you need an AVR flashing software. There are a number of different options to choose from but I higly recommend using the KKmulticopter Flash tool. This software is specifically made to flash KK boards and is extremely simple to use. You don’t have to know about fuses or anything. The software even fetches the firmware file for you. And one of the best things, it works on both PC and MAC.

Download and install the software from this page.

Install the proper drivers for your AVR programmer. If your on a mac and use a usbasp you don’t need to install any drivers.

Launch the software
Flash1
This is how it looks when you start it up. First thing you’re going to do is change the ”controller”

Flash2
Choose the ”HobbyKing Quadcontroller” board from the list.

Flash3
Choose the firmware you wish to use from the firmware drop-down list. The software automatically only shows softwares compatible with the controller you chose.

Flash4
Change the port to ”usb” and make sure that the correct programmer is chosen in the top drop-down list. ”usbasp” is the default one.

Push the green ”go” symbol and sit back and relax while the software does the work for you. It takes about a minute to flash the board. Once it’s done the software will tell you: ”avrdude done. Thank you”

Thats it! You’re done. Unplug the programmer and go out and fly. Good luck!

Lawmate Saw filter upgrade results

Hi guys, sorry for not posting in a while. I’ve been ill this passed week, but now I’m fit for fight.

A while back I upgraded the SAW filter in one of my two lawmate receivers.
lmsaw7
I have now done comparison between the modified and unmodified receivers.
The test was done over multiple flights with both receivers hooked up to a diversity switch (Eagle Eyes). Between each flight I swapped the antennas between the two receivers to eliminate that variable.

I wasn’t too surprised by the results. The modified receiver had better performance than the unmodified one, but not by a huge amount. Both receivers worked well but the modified one was nearly always chosen by the diversity switch. I didn’t really notice a huge boost in range but there was a slight improvement, I think. Maybe it’s just a delusion of mine. If you’re on the fence about exchanging the filter in you’re receiver but unsure if you’re really up to the task, I would recommend not doing it. The juice might not be worth the squeeze. However if you like modifying and soldering go right ahead. It does improve the performance and it’s kind of cool to have a modified receiver to boast to you’re friend about.

Link to the DIY guide to changing the SAW filter in your receiver