

Specifications:
Name: Twin Star II
Manufacturer: Multiplex
Type of product: Model Kit
Airplane type: Trainer
For: Beginner to intermediate pilots
Flying weight: ~1500 g (53 oz)
Length: 1085 mm (43”)
Wingspan: 1420 mm (56”)
Wing area: 43 dm² (4.7 sq. ft.)
Wing loading: ~35 g/dm² (11.5 oz./sq. ft.)
Prop: 2 x 5*4” Included
Motor: 2 x Permax Speed 400 Included
Servos: 4 ~9-20g servos
CG: 85 mm from the leading edge of the wing
(more…)
Author: RCExplorer – David
-
Multiplex Twin Star II Review
-
FPV Testing
Since this is a new airplane and it’s the first FPV flight, I let someone else watch in FPV while I fly the plane. And why not try out my new DIY antenna and compare it with the stock antenna while I had the chance?
-
Twin Star video
Here is the long awaited Twin Star video! Enjoy!
Click here for the build log of the Twin Star -
Multiplex Blizzard


No wasted space in this box.
Everything that comes in the box.
8.5(!) meters of glass fiber that will be glued on to the model.
Here we go! I used my Dremel with a cutting disc to cut the glass fiber.
This build requires a lot of glue. Have a cloth near by to wipe of excess glue.
Both sides done.
I will be using two servos in the V-tail to be able to have both rudder and elevator control. This Elapor is dense and surprisingly hard to cut thru.
Glass fiber on the inside of the canopy latches.
Soldering the wing servo connector.
Glued into the wing retainer plate.
Glued the retainer plate to the fuselage.
2.4Ghz receiver in place.
Tail servos glued in place.
I didn’t want to cut the leads on my “expensive” servos, so I used some extensions.

All cables hooked up to the receiver and the two fuselage pieces glued together.
Outside view.
Motor bulkhead glued on.

rear fuselage fairing in place.
V-tail panels inside glass fiber and control horns in place.
V-tail in place.
Glass fiber reinforcements on the bottom of the V-tail.
More reinforcements along the whole bottom of the fuselage.
And one along the whole top.
Wing halves glued together.
Glass fiber along the top of the wing.
and on along the whole bottom as well.
First carbon fiber square tube in place.
And the second one.
Glass fiber fish bones.


That was a lot of gluing!
Wing centre section doubler glued on.
Soldering on some longer wires.
Done.
Connector glued in place.
HTX900 fits good enough.
The wires on the 3s2200 made the battery not fit properly in the fuselage so I re-soldered them.
Results.
Motor and spinner with blades.
I soldered the connectors right to the speed controller.
Motor in place.
Spinner screwed on. I used folded newspaper in between the spinner and the motor bulkhead to get just the right amount of clearing.
ESC in place.


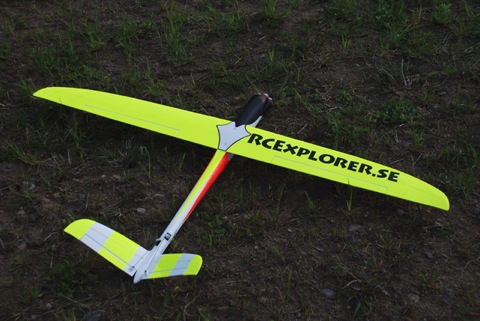
Monokoted.
Very visible.
Maiden time!
Up, up and away!


Power setup:
Turnigy 35-42C 1100kv Brushless Outrunner
40 mm spinner with air intake swinging 11*8 blades.
SuperSimple 40A ESC
3s OEM 25-35C 2200mAh LiPo
2 x HS65HB
2 x HTX900 -

Multiplex Twin Star II


Everything that comes in the box.
Shortened one of the snakes.
Snakes glued in.
Wing retainer screw plates.
Glued in place. Be sure not to use to much glue when gluing these.
Canopy latches.
I chose to extend the battery compartment by cutting away this part.
Servo with cable glued in place.
I’m going to use this airplane as my FPV platform so I went ahead and mounted the GPS inside of the body.
I’m going to mount the receiver in this compartment and I want to be able to access it easily, so I made a hatch.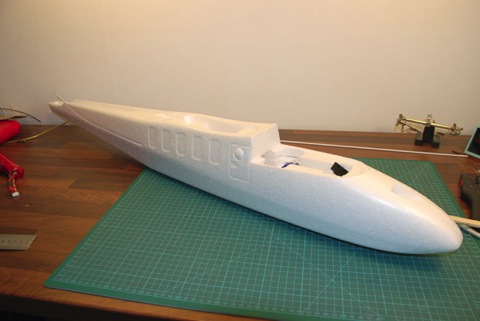
The fuselage halves glued together.

Tail glued on.

Time to start working on the wings. First cut away the “stub wings”.
Since I’m going to use a brushless setup I’ll need to do some modifications. The motors had a bigger diameter so I turned the motor mount around and sanded the inside. I also had to shorten the mount a little.
I soldered the motor directly to the ESC.
Motor mount glued in place.
I used a little glue to hold the cables in place.
Wing done!
This thing is massive!
Monokoted.
Time for a maiden flight.
Fly!


Success!
Power setup:
2 x TP2409-12D 1600kV motors
2 x 8*4DD GWS props
2 x 30A SuperSimple ESC’s modified
4 x HXT900
3sA123 -
I’ve got a new transmitter!
Woho! Finally I get that extra channel that I wanted. It was my good friend Christian that made me a deal on this T7CP 35MHz transmitter. But I don’t fly on 35MHz so I modified it to 2.4GHz using the “module” from my T6EX 2.4GHz transmitter. It turned out great and works like a charm. And while I was in there soldering I changed the red power led to a purple one, just to add that little extra.
 (more…)
 -
Blizzard video
Finally the weather cooperated long enough for me to get some video.
I edited the Blizzard video first and will finnish the Twin-Star one later.
Click here for the build log of the Blizzard.Enjoy!
-
Full-scale studies
Yesterday I did some full-scale studies on an Air-show called “Flottiljens dag”. It was a beautiful day, just the right amount of wind to keep cool and an almost perfect blue sky. I brought the camera and took some pictures when I felt like it, but for the most part I just enjoyed the show. I went with my buddy Christian and his family and we had a blast! If you have not yet been to an air-show, you need to go to one!
 (more…)
 -
I’m mentioned on R/C FlightCast again!
The good guys Frank and Brian has been kind enough to mention me in episode 57 their podcast called R/C FlightCast again. They seem to like my homepage and my style of posting more pictures than words.

To listen to the show, click here.Thanks to Frank and Brian!
