A lot of people have asked me to make a guide on how everything is connected and the setup, so here it is.

The tricopter is controlled in the exact same way as a 120° CCPM swashplate on a normal helicopter. Which is to say that when you want the tricopter to go forward (elevator) the two front motors slows down and the back one speeds up, when you want it to go right (aileron) the left motor speeds up and the right one slows down and vice versa. This means that you connect the three speedcontollers just like you would the three servos on a 120° swashplate. On my Futaba setup that means left motor channel 1, back motor channel 2 and right motor channel 6 (looking at the tricopter from the back, tail facing you).
If you were to try to fly a tricoper without gyros you would probably crash straight away. This is because every motor has little different kV and the ESC’s aren’t perfectly matched. This means that every motor will react a little differently to throttle input and not spin up to the exact same RPM. Even if you got it trimmed out perfectly, a tricoper isn’t a self stabilizing aircraft. It doesn’t want to stay nice and level. It wants to crash. It would be quite a handful simply to keep it in a hover, especially if there was a breeze outside. This is why a gyro on each motor is used, to make it stable and easy to fly.

A gyro is made to counter any acceleration on the axis that sensor is measuring. So if a force (like the wind) tries to tilt the left arm of the tricopter upwards, the gyro on that arm makes the motor slow down enough to prevent the arm from accelerating upwards. Each of the gyros have no idea of the other gyros on the tricopter and only keep tack of their own motor. This is why the gyros needs to be mounted in the same angle as the arms which holds the motors, so they compensate on the right axis.
The gyros that control the motors must be in rate mode. If heading hold mode is used the gyros will try and fight each other, inevitable ending in a crash. The easiest way to tell if a gyro is in heading hold or rate mode is to connect a servo and see if it creeps in any direction. Another test is to move the gyro to see if the servo moves to its max position and if it returns to neutral or not when you stop moving the gyro. If it’s in rate mode the servo only moves when you move the gyro and returns to center when you stop moving the gyro, so if it creeps or doesn’t return to neutral you should change the mode (which is done by inverting the gain).
The tail (yaw) of the tricopter is controlled by tilting the back motor to the left or right.

This is done by a servo just like on a normal helicopter, and just like on a normal helicopter a gyro is used on this axis as well. This brings the total of gyros on a tricopter to four. This gyro can be used in either rate or heading hold mode, depending on which you prefer. (If you don’t know which one you prefer, I recommend using heading hold.) Thanks to the other three gyros, the tricopter remains perfectly level when the tail rotor is tilted and the tricopter rotates around its own axel.
Hooking everything up
This is a diagram showing how everything is connected on a tricopter (click for a larger picture):

The three main gyros are connected in series with the ESCs and the three gyro gain wires are connected together in parallel to the same channel, in my case channel 3. This means that the three main gyros have the same gyro sensitivity. The tail servo is connected in series with the tail gyro and the gain wire is connected to channel 5 which is the gyro gain channel on my Futaba system. This way I can change both the gain on the tail gyro and the three main gyros separately directly in the transmitter.
Transmitter settings
Observe! For the following example, you will need three servos of your choice (whatever you have lying around). These servos will not be needed any more once the setup is done.
Now it is time to program your radio. I use a Futaba 7C so that’s what I’ll be using as a reference. Start of by switching to helicopter mode and set the swashplate setting to 120° CCPM (HR3). Before you start, you should test one speed controller connected to channel 3, to make sure that you have the throttle settings the right way and not reversed. Then plug in a servo and watch to which endpoint it goes to. This is so you know which way the servo moves when more throttle is applied. Now you can use three servos instead of the speed controllers to set things up, as it’s much easier to see exactly what’s happening and much less risk of getting hurt. Hook up the three servos to channel 1,2 and 6 without the gyros. At this stage all we want to know is that the swash settings are correct, no need to add variables to mess things up. Go into the swash menu and change the settings to Aileron +40, Elevator +40 and Pitch +100.
Move the throttle stick upwards, all three servos should be moving up. If they don’t, go into the reverse menu and reverse the channel that’s moving the wrong way. Try again. When all the servos move up when you increase throttle your can proceed to the next step. If all servos move the wrong way change the Pitch setting in the swash menu to -100 instead of +100.
Move the throttle stick to around the middle and leave it there. Then move the aileron stick (left stick) to the right, the servo connected to channel 6 should move down, indicating less throttle, and the servo connected to channel 1 should move up, indicating more throttle. If it’s reversed go into the swash menu and change the Aileron setting to -40 instead of +40. Try again. It should be moving the right way now. The servo connected to channel 2 should not move at all.

Move the elevator stick (left stick) forward, the servo connected to channel 2 should move up (more throttle) and the channel 1 and 6 servos should move down (less throttle). If it’s reversed change the Elevator settings to -40 instead of +40.
These are the settings I ended up with:
No reversed servos
Swash Ail +40, ELE -40, PIT +100
Time to set up the three main gyros. Connect the them in series with the servos and connect the three gyro gain wires to channel 3. It will make things much easier if you have the gyros placed on the frame at this stage. Set your throttle curve to 0% and move a gyro to check if it’s in heading hold mode. If it is in heading hold mode, set the throttle curve to 100% instead to switch the gyros to rate mode instead. Now tip the frame in the same direction as one of the arms and keep an eye at the servo connected to that arm. When you tip the arm downwards the servo should be moving up (more throttle) to compensate. If it doesn’t you need to change the little dip switch on the gyro called servo direction, reversed or something similar. Try again to make sure that it moves in the right direction. Repeat this with the other two arms.
Check that the tail servo is moving the right way when you move the rudder stick. If it doesn’t reverse channel 4 in the radio. Set the gyro gain (channel 5) to 0% and check if the gyro is in heading hold mode, if it’s not set the gain to 100% instead. Check that the gyro compensates in the right direction by swinging the tail one direction, the servo should give throw in the opposite direction. If it doesn’t reverse the direction switch on the gyro.
You’re almost done now. Set all the point on the throttle curve to 30% (70% if you had to invert channel 3 to get the gyros into rate mode). This is a good starting point for your first jump with the tricopter.
Set the gyro setting on the tail to 20% (or 80% if channel 5 inverted to get it into heading hold mode).
Complete your build and hook everything up according to the diagram above. Be sure to double check everything. Every time you start your tricopter you have to recalibrate the throttle endpoints on your speed controllers. This is to make sure that they all have the exact same endpoints. So to start up your tricopter first power up the transmitter and reset all the trims, then move the throttle stick to the max position (full throttle). Plug in the battery in the tricopter and wait for the gyros to initialize. Wait for the ESCs to sound their beep for entering throttle calibration and then move the throttle stick to the down position. The ESCs should play a little tune indicating that they are ready.
Time to test fly!
Find a pretty big open space without any wind. The first flight will be dedicated to setting the gyro gain. Take of and get it above the ground effect (0.5 meters or so). If it doesn’t wobble or oscillate, land it and increase the gain of the main gyros by 2% (e g to 28% if you had 30% before). Try it again and repeat until you start to get a faint oscillation (the gyros overcompensating), land it and lower the gain by 1% and your done! Now it’s as stable as it can be. Do the same thing with the tail gyro, but don’t be surprised if you get to 100% without oscillation.
My current gain settings: Throttle curve 14.5% (main gyros), Gyro gain 11% (tail).
If you feel that the tricopter is too sensitive around mid-stick you can add some expo, lower the rates or lower the aileron and elevator swash settings. I like my tricopter at 40% aileron and elevator settings with no expo and 100% at all rates, but to each his own.
Good luck and fly safe.


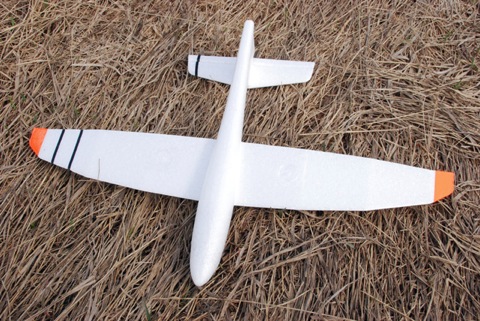
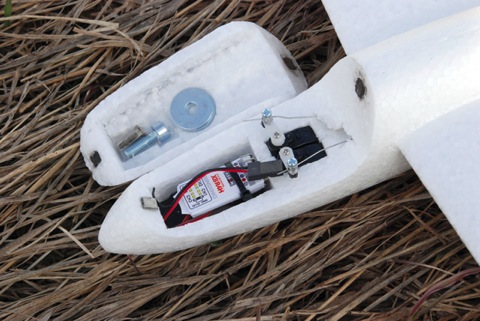
 I found this cute little free flight glider when I was visiting a local RC event and I just had to have it. The plan is to convert it into a RC glider using nothing more than two servos, a battery and a receiver.