Author: RCExplorer – David

  • LED Photo/build lights

    LED Photo/build lights

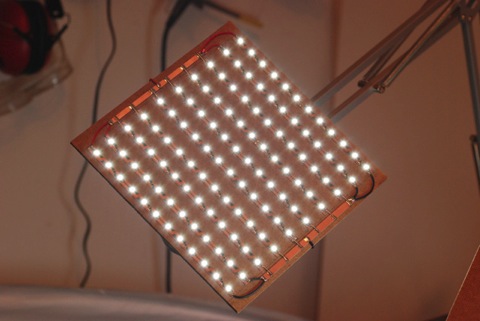
    In my quest to get better lighting for building and for photoing, I found these incredible cheap LED strips from HobbyKing. They are 1 meter long and have 60 LED’s, but the best part is that they can be cut every 3 LED’s. So instead of ordering a bunch of LED’s and make my own PCB’s, I decided to buy a couple of these instead.


    The strips are very bright and have a nice wide beam-width. They are powered by 12V and give a slighty bluish light. But that’s no problem, I’ll just use a custom white balance when photographing.


    I used two 1 meter strips that I cut into 12 LED’s segments. The strips comes with 3M tape on the back so all I did was peel of the covering on the back and attach the 10 strips to a piece of masonite.


    I wanted to be able to dim the LED’s to have better control over the lighting when photographing so I made a simple LED dimmer. It’s based on a 555 chip and is very simple to build.


    (If you want a copy of my design, just give me a shout and I’ll send you the layout)


    Picture borrowed from reuk.co.uk

    Here is a schematics of the circuit. I did some modifications to it, like removing the C3 capacitor that’s there for inductive loads. I also used a 20k pot with on/off feature and a bat54SW diode instead of the 1N5148.


    I glued on my LED masonite boards to a couple of desktop lamps. This gives me full control over angle, distant and position of the light.

    The wide beam-width contributes to a nice even soft lighting with minimum amount of shadow.


    I mounted my LED dimmers in the top of the desktop lamps. Now I need to get some knobs.


    Here is a sample picture with the new lights. I found that a custom white balance of about 7700 Kelvin gives me the colors I want. The two lights I made were plenty bright enough to take good pictures of small to medium sized items but I need to make a third for photographing airplane builds and such.

  • New Guide; LED Photo lights

    After rearranging the furniture in my RC room to make better use of the space, I needed some new photo/build lights (or at least now I had an excuse to). I knew that I wanted to build my own lights to get it just the way I like it. I also knew that I wanted to use SMD LED’s with wide beam-width. But rather than buying a bunch of LED’s and making my own PCB I found a perfect alternative on HobbyKing.

    Click here to read the guide

  • The FPV FunJet V2

    The FPV FunJet V2

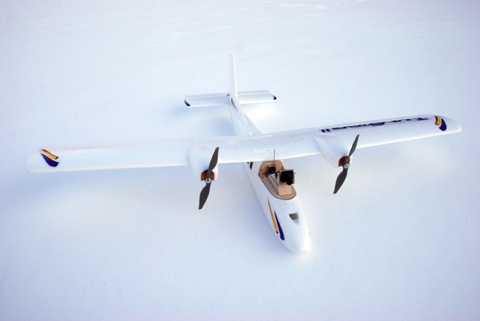
    Since my last FPV FunJet died a horrible death, I needed another airplane to take its place. Since I loved my old FunJet so much I decided to get another one. Here is a link to the old deceased FunJet build


    Ahh I love the smell and feel of fresh Elapor.


    quarter wave antenna mounted vertically. I will be placing the video transmitter inside of the wing instead of having it up front with the camera like on the old setup.


    The antenna mod makes the transmitter a lot lighter and more compact.


    I used a knife and soldering iron to make a well for the video transmitter.


    Nice and snug fit.


    I used the pre-made trench (made for installing a 35MHz antenna) to install the video TX wires.


    Nice and clean.


    I added a small weight to the other wing tip to make the it balance properly.


    Simple OSD current sensor added in line with the ESC.


    Futaba FASST receiver in place.


    The wife helped me with the covering layout.


    Pretty much done.


    Underside.

    Specs:
    Motor: Warp 4 3-turn 2580kV
    ESC: Mystery 40A
    Battery: 3s Turnigy 25-35C 2200mAh LiPo
    Servos: 2 x Hitec HS-65HB
    Prop: 6*4
    Power: [email protected] – 22000RPm (6*4 prop) – 1000 grams thrust

    FPV setup:
    Power: Through main battery
    Transmitter: 300mW 1.3GHz
    Camera: Aiptek Z500 HD camera modified
    Lens: f3.6 mm “Stock”
    Pan/Tilt: Only pan – 1 multiplex nano-s modified for 180°

    The FunJet GoPro Edition
    Since the Aiptek Z500+ camera died during a crash, I decided to see if the FunJet could carry the GoPro Hero HD camera.


    To get a clean picture and get the CG back, I cut of the nose of the FunJet.


    I then removed some material to fit the GoPro inside of the fuselage and be able to pan it 180°.


    Looking straight ahead.


    To the right.


    And to the left.


    Lens in the center.


    I reenforced the canopy with 1.5mm plywood. I also added magnets to keep the canopy in place during flight.


    Two old 3s500 packs had to substitute for the camera during the first test flight.

    The FunJet GoPro edition weighs in at 720 grams, which is quite porky. And on top of that, it’s not very aerodynamic any more. But the first flight went good. It needs more speed to stay in the air and it’s not as nice to fly compared to the old FunJet. But it’s good enough to get some high speed shots with.

    Now it’s time to test it out in FPV!

    You can read about the first, and last FPV flight here

  • A sneak peak of an upcoming project

    I just received 3 AXN 800kV motors, 3 SuperSimple 18-20A ESC’s, 3 Turnigy 302 gyros and 1 HK 401B gyro. All these items will be used in a project I hope to start on soon. Anyone care to take a guess on what it might be?

  • Show #7 – Remembering Summer


    Click here to watch in HD

    It’s currently -15°C, windy and 50 cm of snow here in Sweden. I was searching around on the computer when I found some video footage that I had forgotten I had recorded. The footage were from the summer of 2009 and watching it made me long for summertime again. (more…)

  • Progress on the HD camera

    Sorry for the lack of updates lately, I’ve been really busy. But in the time I managed to squeeze in for RC I have managed to build a simple lens mount for the Aiptek Z500+.

    It works great, and it’s light weight. It’s nothing more than two PG-7 plastic nuts that I glued in place. The treads on the nuts were way to steep but after screwing the lens in and out a couple of time they succumbed and the lens is perfectly straight and secured.

    The total weight of the camera at this moment is 35 grams! And it works!

    I also added some glue to the ribbon cable connectors to make sure that they aren’t stressed when panning.
    More pics on the project page

  • Project FPV setup for a friend is now finished

    The project is now finished. It took quite a bit longer that I thought it would but now it is done. Everything worked like a charm during the 3 test flights and she flew very nice with plenty of power from the power setup.

    It’s with a little twinge I send it on its way to it’s new owner. It turned out so nice. I hope my friend takes good care of her.
    Check out the pics on the project page

  • Aiptek Z500 PLUS HD camera for FPV

    Aiptek Z500 PLUS HD camera for FPV

    After failing to get the Camileo P10 HD camera to work with a remote sensor head (for pan and tilting) I decided to have another go. I searched around found out that some of the Aiptek models with optical zoom had their sensors mounted on a ribbon-cable. I found a used Z500+ on a Swedish auction site for less than €50, so I gave it a shot.

    Recording: 1440*1080p in 30FPS , 1280*720p in 60FPS
    Weight: 204 grams (with battery), 178 grams (without battery)

    720p in 60FPS is very nice! I look forward towards testing it out.

    Time to start disassembling.

    Remove battery


    Remove the screw above the USB connector


    Remove the metal-sticker on the top and remove the screw


    Remove the mic protection plastic thing.


    Remove the plastic piece on the front that is held in place with double sided sticky tape and unscrew the two screws.


    Underneath the rubber screen protector you’ll find two screws.


    Remove the plastic around the buttons on the back and unscrew the two screws.


    Now the whole backplate will be loose.


    Next, remove the metal collar around the lens. It’s held in place with double sided tape. Then remove the screw underneath.


    Then remove the screw that holds the clear plastic in front of the leds and flash.


    Then remove the screw under that.


    And now you can take the back off.
    Yay! It has a ribbon-cable!


    The PCB is held in place with 3 screws, unscrew them to get it loose.


    Unplug the LCD display cable.


    Here it is, removed from its shell.


    The ribbon-cable between the PCB and sensor.


    I removed the zoom lens controller board from the main PCB.


    I also disassembled the zoom lens and removed the flash and capacitor.


    The backside of the PCB. The camera is built around the Ambarella A2-A1-RH-A270C chipset.


    The front of the PCB.


    I used my dremel to remove the unnecessary plastic left from the zoom lens. I plan on making a mount for a standard lens.


    The back of the sensor.


    Here is a comparison shot with with the Camileo P10.


    After searching around for anything I could without to much effort modify into a lens mount I came up with this solution. It’s nothing more than two PG-7 plastic nuts that I glued in place. The treads on the nuts were way to steep but after screwing the lens in and out a couple of time they succumbed and the lens is perfectly straight and secured.


    I also added some epoxy glue to the ribbon cable connectors to make sure that they aren’t stressed when panning.

    Unfortunately I managed to destroy this camera in a crash with my Funjet. I though about building another one but the ribbon cable turned out to be shorter than I needed it to be to be really useful.

  • Disassembly of the Aiptek Z500+

    I couldn’t wait any longer! I had to disassemble the Aiptek Z500+ and find out if had a ribbon-cable between the PCB and sensor.

    It did! Success! It it was quite a long cable as well. Perhaps I don’t even need to replace it with a longer one, it might just be long enough as it is.
    Great news!

    I made a project page on the progress which also contains a step by step guide to how to do the disassembly;
    More info and pictures

  • A HD suprise!

    Did you all think I was just going to give up after the fiasco with the Camileo P10? Then you were kind of right… I have given up on trying to make that camera work with a remote camera head. Instead I decided to try my luck with another camera. I found this diamond in the rough on a swedish auction site and won it for less than €50.

    It’s an Aiptek Z500 PLUS and it can record in both 1440*1080p in 30FPS and in 1280*720p in 60FPS!

    For more pictures and info click the “Read more” (more…)