It was a long time since I owned a helicopter, they were to expensive and fragile. I hated that you had to order replacement parts every time you had a minor crash. I want to be able to repair it my self, swift and easy. So I decided to design my self a Tricopter. That way I get it just the way I want it.
Be sure to check out the Tricopter V2 and V2.5 builds as well!
So what is a Tricopter?

It’s an aircraft similar to a helicopter except it has three rotor disks. The beauty of the design is that three ordinary outrunners direct driving ordinary propellers can be used. Four helicopter gyros makes the tricopter super stable. And to make it yaw a servo tilts the back motor. You set your radio for 120° CCPM and your good to go. It’s as simple as that. Very low part count, simple, cheap, easy to build with no advanced electronics needed.
Read my guide on how to set our own tricopter up.
What to buy?
After testing various speed controllers, motors, gyros, etc. These are the electronics I recommend buying for a tricopter weighing under 1.2kg:
3 x 2213N 800Kv Brushless motors
3 x TURNIGY Plush 18amp Speed Controllers
4 x Hobby King 401B AVCS Digital Head Lock Gyro
1 x 6 pack GWS 10*4.7 propellers
1 x 10 pack prop adapters
1 x BMS-385DMAX Digital Servo (Metal Gear)
1 x 3S 2200mAh Turnigy LiPo
1 x Turnigy UBEC for making the “jump starter” for the gyros
These are electronics I know work good on a Tricopter and have personally tested.
The Build
Now lets start building.

I used 1.5mm DIY PCB glass fiber laminate for making the motor mounts.

This is my solution for the back motor tilt. It’s a T-Rex 450 blade grip mounted to a piece of plastic.

It’s super low friction that I hope will give me a slop free tilt mechanism.

The back motor mount test fitted with the tilt mechanism.

I used a T-Rex 450 tailboom that I had laying around for making a light weight filler so that the glass fiber lamination doesn’t flex when I screw down the motor.

I made a simple servo mount to get the servo to the right height and make it easy to remove.

Here are the servo plates that also holds the tilt mechanism.

To remove weight I etched away the copper from the glass fibre laminates.

Test fitting the motor mount.

Turned out pretty nice. I will be using wood as my arms and as you can see in the picture, the mount is just screwed down, clamping the wood. This makes it super easy to fit new arms if I ever brake one or want to try longer ones.

This is my frame design. It’s not super pretty but I hope it does the job.

My tricopter is going to be foldable so I drilled a hole through the two front arms.
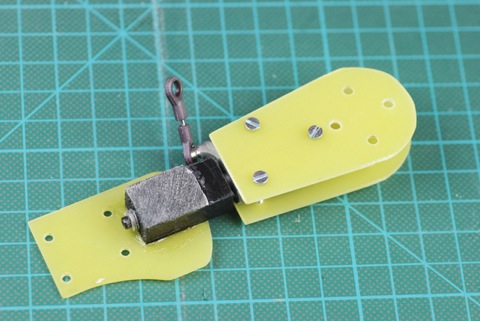
The tilt mechanism almost done. I had to add a piece of plastic to make it as thick as the arms.

Tilt mechanism done.

Motor mounts done.

I cut of a piece of the top piece of the frame to be able to mount the receiver in-between the to sheets of 1.5mm glass fiber laminate.

Gyros in place.


Started work on extending the cables on all the ESCs. Before and after.

All the electronics in place.


For some reason the Turnigy gyros did not work well with the Futaba receiver I had planned on using. I think it has something to do with the shorter frame rate Futaba 2.4GHz system uses. It made the output of the gyros go crazy at some points, so now I use a Assan 6 channel receiver.


Tilt mechanism cable solution.

Underside of the frame.

The arms when the tricopter is folded for transport.

The frame when it’s folded for transport.


Time for a test flight!

It flies!

Done.
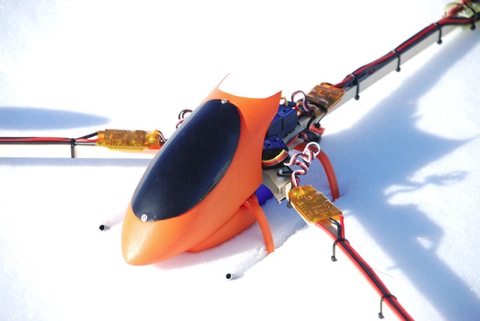
The canopy and landing gear are from an old T-Rex 450. I simply trimmed it a bit and painted it orange.


I think it turned out pretty good, if I may say so my self.
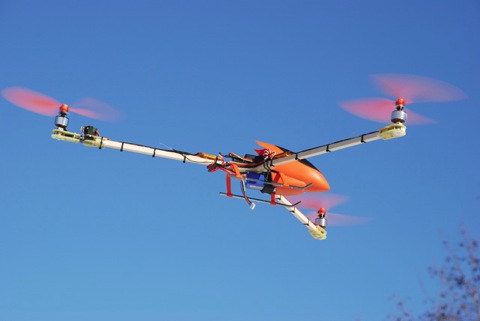
Now it is time to take it to the indoor event!
This is the premiere flight from the indoor event;
It’s a joy to fly! So stable and forgiving. I think it will make a great FPV platform.
Specs of the Tricopter:
Motors: 2213N 800Kv AXN
ESC’s: Supersimple 18A Card Programmable
Battery: 3s Turnigy 25-35C 2200mAh LiPo
Servo: Power HD 2216MG Digital
Props: GWS 1047
Power: [email protected] – 6370RPM – 780 grams thrust / motor!
Size: 40cm radius (center to motoraxel)
All up weight: 777 grams
Flight time: 15 minutes
Current draw during hover: ~8A
Because you asked for it, here is the PDF template of the center and motor plates:
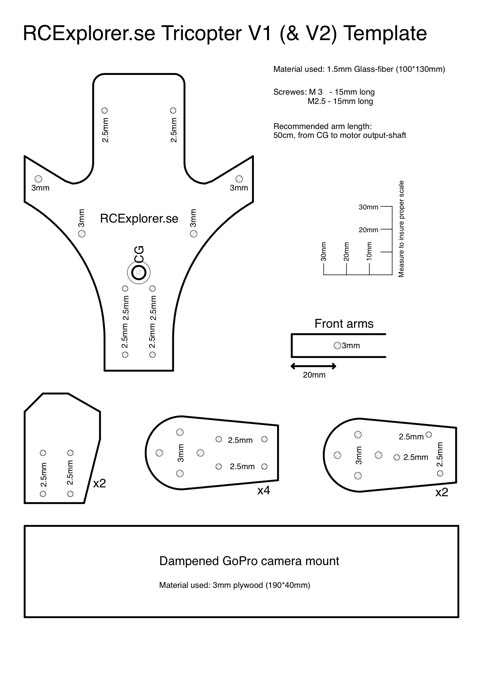
Click on the picture or here to download
Be sure to set the page scaling to 100% when printing.
Due to popular demand I now offer pre-cut V1 tricopter frames!
Do you want to build your own Tricopter but don’t know how to set it up? Read this guide and you will find the answers.
First FPV video from the Tricopter:
Setup:

RC TX: Futaba 7C FASST 2.4GHz
RC RX: ASSAN 6CH
Camera: 1/3” Sony CCD camera (more info)
Video TX: 1.3GHz 300mW, 1/4 Lambda antenna
Video RX: 1.3GHz dual output
Video RX antenna: Stock whip
OSD: Flytron SimpleOSD XL + GPS
Video capturing unit: Sandisk V-Mate
Tricopter V1.5
Since the Trunigy 302 gyros doesn’t work well with my Futaba FASST receiver I decided to try using 4 Hobbyking HK401B gyros instead.
I noticed on the old 401 gyro I had that the PCB inside of the case wasn’t secured properly so before mounting the 4 new gyros I took them apart and secured them a little better.Here is how to do it;

Unscrew the 4 bottom screws and lift out the PCB.

If you want to be absolute sure that the cables aren’t stressed and break in a crash, use a bit of hot glue to secure them to the PCB.

To secure the PCB inside of the case use a small drop of hot glue in each corner of the case and while it’s still hot place the PCB in the case and push it down until it’s fixated.

To make absolute sure that the PCB will remain fixed I used an extra piece of foam between the lid and the PCB. Now screw the case together and you’re done.

Since the HK401 gyros have a bigger footprint I needed a slightly bigger frame. But instead of making a totally new one I simply made a modified top plate.

Futaba FASST receiver mounted.
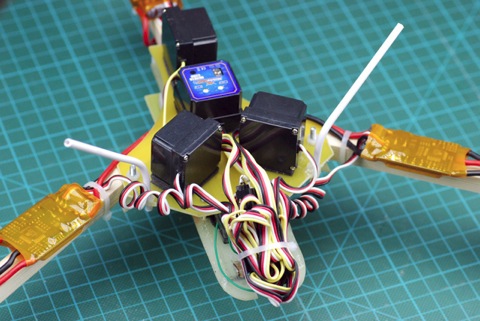
All done!

One thing I noticed right away with the new gyros is that do not arm the ESC’s. This is because they do not give a valid signal during the start up initialization, this makes the ECS’s think that you have an FM receiver without a valid signal and the ESC’s goes into protective mode. Which is to say they will not initialize until they are restarted and get a valid signal. But if I was to restart the ESC’s the gyros will reboot as well since I’m using the built in BEC’s of the ESC’s and were back to square one again. To solve this problem I made an external BEC to “jump start” the receiver and gyros;

When I plug this external BEC (with a diode in series with the possessive output, just to be sure) into a free channel on the receiver and then connect it to the balance connector on the battery, the BEC will only power the receiver and gyros. After the gyros have initialized I plug in the main battery connector, powering up the ESC’s. Now the ESC’s get a valid signal and boots up just fine. I then remove the external BEC that I used to “jump start” and can now enjoy my flight.

Time to fly!
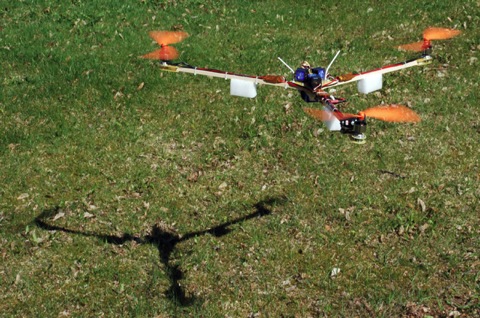
It flies!
Comparing the old Turnigy 302 gyros to the new HK401B, the HK401B’s are much more sensitive to vibrations. But once you get rid of the vibrations the HK401B’s perform a little better than the 302’s. It feels a more locked in and even more stable. The HK401B’s also work in digital mode, unlike the 302’s that made the whole tricopter jerk horrible in mid air at random times. But the best part is that they work great with my FASST receiver. I’m happy that I tried the HK401B’s.
First HD FPV video from the GoPro Hero HD;
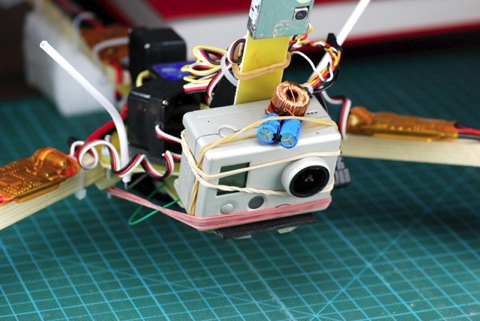
Setup:
RC TX: Futaba 7C FASST 2.4GHz
RC RX:R606FS
Camera: GoPro Hero HD set at 720p 60FPS
Video TX: 1.3GHz 300mW, 1/4 Lambda antenna
Video RX: 1.3GHz with modified SAW filter
Video RX antenna: Stock whip
Because you asked for it, here is the PDF template of the center plates:

Click on the picture or here to download
Be sure to set the page scaling to 100% when printing.

is it possible to use deprom in stead of glass fiber?
David, how did you etch the copper from the PCB? I bought some PCB recently from ebay and have no idea how to remove the copper. Here is what I bought: http://www.ebay.com/itm/5pcs-10-x-15CM-Single-sided-PCB-CCL-fiberglass-board-FR4-1-5MM-thick-/130768866804?pt=LH_DefaultDomain_0&hash=item1e726e8df4