Author: RCExplorer – David

  • I’m in a Swedish RC magazine

    The Swedish RC magazine “Radiostyrt” has just published an article about the 24-hour competition I entered during my stay at Domaine du Planet. The article is written by my friend Daniel Larson (http://www.pbase.com/larson_daniel) who was on the same team as my self. The article is four pages long with lots of pictures. Ahhh I hope I can reenter the competition next year. I had such a good time.

    For those of you that cant read swedish or can’t get a hold of the magazine, Daniel shoot a bunch of great pictures during the competition: http://www.pbase.com/larson_daniel/24hours

  • Mikrokopter Octocopter build

    A good friend of mine, Corey, who lives on the other side of the “pond” (the US) asked me if I wanted to help building a Mikrokopter Octocopter kit he recently purchased. I accepted right away. It’s not every day you get to build a 2000 dollar multi-rotor platform and compare it to your own 100 dollar platform… I’ve just started the build, check it out here

    Take me to the buildlog

  • Mikrokopter Octocopter

    Mikrokopter Octocopter

    A good friend of mine, Corey, who lives on the other side of the “pond” (the US) asked me if I wanted to help building a Mikrokopter Octocopter kit he recently purchased. I accepted right away. It’s not every day you get to build a 2000 dollar multi-rotor platform and compare it to your own 100 dollar platform.

    This is the box everything arrived in. First I thought there had been a mistake. An Octocopter can’t possible fit inside this tiny little box?


    Here it is compared to my folded tricopter (which btw is under reconstruction in this pic).


    To my surprise the complete kit with motors, props, arms and everything was in there.


    The “Flight controller” comes pretty much pre built. Only a few components needs to be soldered.


    Done. The summer will be placed on one of the arms.


    The eight ESC’s are soldered to a kind of distribution PCB. Pretty clever, and very clean.


    All eight ESC’s soldered in place. Every ESC needs to be assigned the correct number by soldering a jumper on the board.


    Time to build the frame.


    Plastic mounts for the ESC’s.
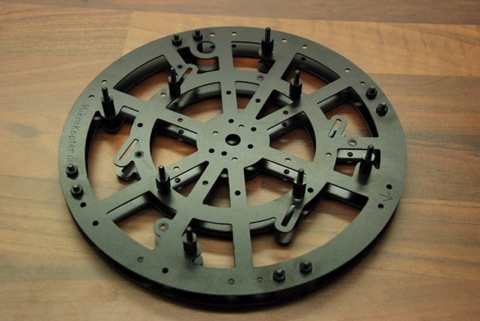

    Top and bottom mounted together.


    The four main arms in place as well as the four rubber dampeners that’s used to mount the flight controller.


    Time to mount the motors to the arms.


    The motors come with very long cables which can be hidden inside of the aluminum arms.
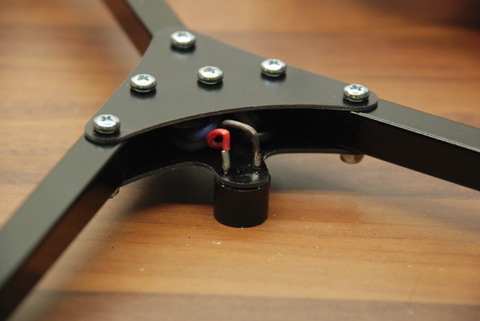

    The summer mounted.


    Motor cables at the frame end of the arms.


    One arm done. Pretty nifty to use four main arms that branch of into two. I wonder how well it holds in a crash though.


    Arms attached to the frame.


    Started soldering the motor cables to the 8XESC board.


    Done.


    The Mikrokopter Flight controller needs the “raw” PPM stream from the receiver, so I modified a Futaba R606FS.


    A pretty simple modification. The signal pin on the “Battery” port was free so all I needed to do was to find the unprocessed PPM stream and solder a cable.


    I placed the receiver underneath the flight controller.


    Test fitting.


    The remaining cables such as the buzzer, PPM cable, power and IC2 bus cables soldered onto the flight controller.


    Electronics in place.


    The USB programing interface also needs a bit of work.


    Done.


    These adaptors are for mounting the pops to the motors.


    Pretty nifty, but you can only use props with a hex fitting on the bottom.
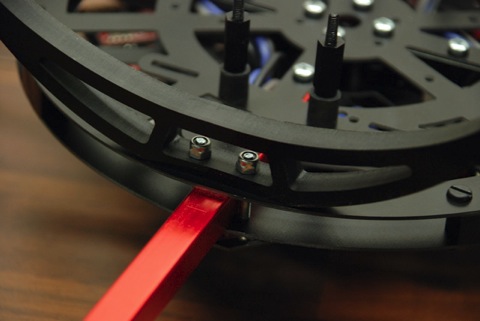

    The landing gear screwed in place.
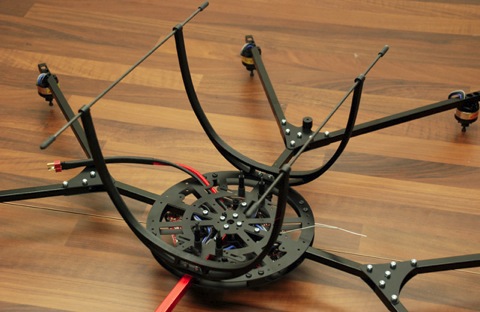

    The landing gear is plenty tall.


    Tada! Now it’s time to figure out the software bit.


    Woho! Figured out the software and got it programmed. I also balanced the props.


    I was disappointed with the quality of the supplied props. The hubs are off center and the plastic feels weak. My APC props feels a lot better with only a small weight penalty.


    It flies! Wow, this thing is stable. It was quite nervous in the ground effect but once out of it, it’s super stable.


    The Octo weighs without a battery 1197grams. I flew it on one 3s2200 Lipo and I think it was a bit light. I think it will be even more stable with some more weight on it.

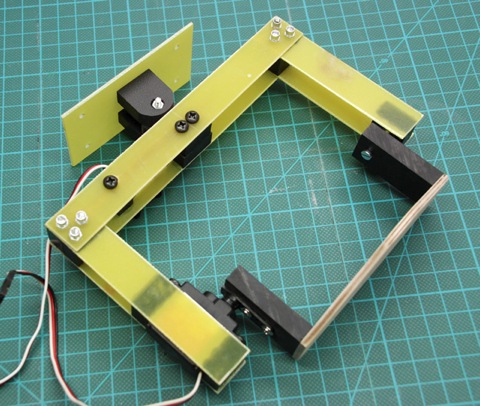
    One cool feature the MK board offer is camera stabilization. But to use it you need a camera gimbal, so I built my own.
    octo37
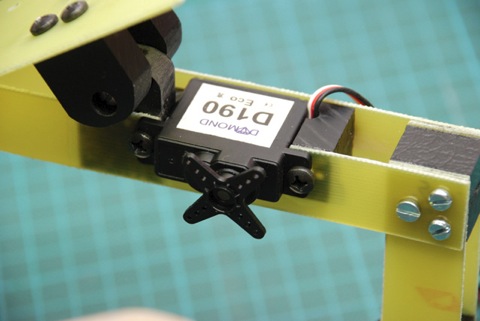
    Tilt servo mounted on one of the arms.
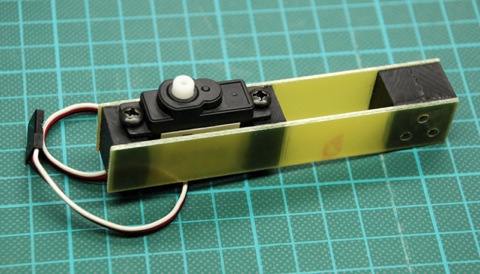
    octo38
    The arms are made from 1.5mm glass fiber and plastic.

    octo39
    The other arm. Ball bearings to make the tilt smooth.

    octo40
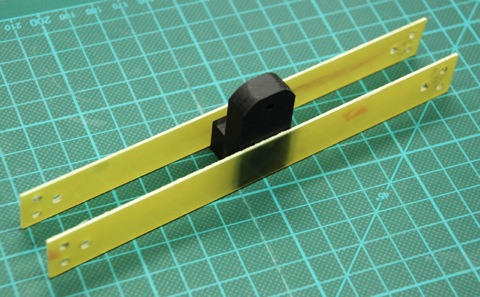
    The top mounting plate with the roll mounting.
    octo41
    The top piece that holds the arms.

    octo42
    Tilt cradle. Made from 3mm plywood and plastic.

    octo43
    GoPro test mounted.

    octo46
    Assembled.

    octo45
    Roll servo mounted.

    octo44
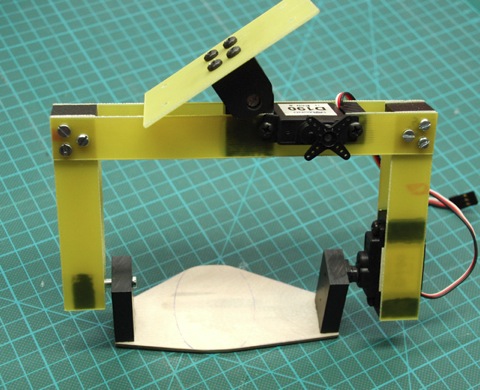
    The two axis camera gimbal soon ready for testing.

    I’m sorry to have to say that I didn’t have time to take any more pictures or videos before I delivered the Octo.
    However I did get to fly it quite a few times before I had to give it to it’s rightful owner. It does fly well once you got it trimmed out. The MK manual (wiki) is one of the most confusing and incomplete manuals I’ve had to read. But after searching various forums for the missing information I slowly got an understanding for PID tuning and ironed out the quirks of the MK flight controller setup. I was expecting a bit more for such a hefty price tag.

    Once I figured everything out and fiddled around with the PID values for a couple of flights it actually flies really good. The auto leveling is really good. Wind performance is good. It feels solid and precise. However I would never buy one for my self. The price tag is simply too high for what you get. The KK platform goes a long way and there are other high performance flight controllers that are considerable cheaper (like the Open pilot, or arducopter)

    I hope the MK octo likes it new life in sunny California.

  • Improving EVG920/RVision goggles

    Improving EVG920/RVision goggles

    I never liked wearing my video goggles. They were uncomfortable and you had to have a t-shirt or something over your head to block out the sun. Well, I wasn’t going to live with that any more! So I went and got myself a pair of ski goggles and started to modify my video goggles.


    In this guide I will show you how I modified my EVG920 goggles but the method should not be to difficult to adopt to any brand of video goggles.


    I started by removing the rubber pads that cover all the screws


    I then unscrewed the screws and using something a small allen wrench I poked the hinge pin out


    I then unhooked the connectors


    Carefully I pryed the clips that hold the front in place open


    The inside revealed.

    The main connector wires
    Green: Right audio
    Brown: Audio Ground
    White: Left Audio
    Blue: Video Ground
    Yellow: Video Signal
    Black: Power Ground
    Red: Power, about 4.2V


    Since I won’t be using any audio I soldered a servo cable to the wires I needed.
    Servo cable red -> Red
    Servo cable orange -> Yellow
    servo cable brown -> Black and blue
    I removed the other cables from the connector


    I then drilled a hole for the cable and fixated it using hot glue on the inside


    I used a dremel to make a hole for the goggles, in the goggles (the ski ones…)


    I then glued the goggles in place using epoxy and painted the front black.


    I was carefull not to get any black paint on the front of the video goggles as there is a IR reciever underneeth the “glass”


    A view from the inside

    The googles are now extremly confertable to wear and they block out the sun very well. I’m so glad I finally made this modification.

  • New FPV video – “Reflections”

    Sorry guys for not posting as frequently as before, but life is really beating me down at the moment. Just for you guys I stayed up late last night editing my latest video – “Reflections”

    This video was filmed in the small town I grew up in, Tibro. I love flying over the water. It’s tough because you don’t get the same visual references for estimating hight and speed. But I like a bit of a challenge. Hope you enjoy the video

  • Reflections

    • Airframe: Tricopter V2
    • Stabilization unit: KK
    • RC TX: Futaba 7C FASST 2.4GHZ
    • RC RX: R606FS
    • Camera: Gopro Hero HD set at 720p 60FPS
    • Video TX: 1.3GHz 300mW, 1/4 Lambda antenna
    • Video RX: 1.3GHz with modified SAW filter
    • Video RX antenna: Stock whip
  • New firmware for the GoPro

    For those of you that have missed it, GoPro has released a new firmware for the HD Hero camera. Why then is this such a big deal? The new firmware transforms the HD Hero into a great FPV camera by enabling live output. Now there’s no more need to “trick” the camera for FPV use. You simply enable live output in the settings menu once and every time you plug in the AV cable, the camera outputs a live video feed.

    The updating process is pretty straight forward. Simply follow the instructions on the GoPro site and you’ll be fine. I’ve updated my camera and I can confirm that it works great. I’m so glad that I took the time to write the “GoPro Hero HD Live output trick” guide now 😉

  • Generous readers

    I would like to devote this post to all of you that have helped me financing this page and my projects. Without you guys this page wouldn’t be where it is today, and for that I thank you. I would like to give a special thanks to Corey from the USA for all his generous donations. I also want to thank Lucas from Switzerland, Charles from the USA, and Micke from Sweden. Micke donated a Hitec Optima 6 receiver which will be placed in the Tricopter.

    No matter if you simply visit this page, write a comment or donate money, I’m grateful for your support.

  • I’m back!

    Hi guys! Sorry for disappearing on you. I’ve been moving to a new apartment (Yay!) and I lost my internet connection a bit earlier than I expected. But now I got it back and the move is nearly finished. The new apartment is 3 room 72.5m2 compared to our old 2 room measuring 57m2. This means that I get a RC-room!

    It’s quite a mess at the time but I think it will be awesome once it’s done.

    The weather here in Sweden has been terrible the past two weeks and I’ve only flown once since the last update. Oh when I say fly, I mean crash.

    The horizontal stab came loose during launch… Now I need a new wing, fin and stab. I will definitely take the time to fix her up or get a new once because F3K is awesome.

    Next update will be soon

  • New guide: GoPro Live output

    Ever wondered how to get live video from a GoPro Hero HD camera? I know lots of you do, because I’ve got a ton of e-mails asking about it. That’s why I decided to make a guide explaining in detail how to get your GoPro Hero HD camera into Live output mode. It doesn’t require any modification what so ever to the camera. It’s also safe, easy and fast to do.

    Click here to read the guide